I wanted to sneak in another edible gift recipe this week. For all of you last minute gift seekers, this will do it! I've been thinking about making homemade peanut butter cups, but after browsing over recipes, I wasn't feeling inspired. Traditionally you would make the chocolate cup, most commonly out of chocolate chips. Then you would fill them with a peanut butter and powdered sugar filling. The end product is great don't get me wrong, but if I'm going to make these, I'm really going to make these well. I was pondering different fillings, or different chocolates, but I wasn't making progress. Then my coworker gave me a spoonful of Asian Jazz Yumbutter. Whoa baby.
Produced by the OM Boys Food Movement in Madison Wisconsin, this peanut butter is not only the best peanut butter I have ever tasted, but every time you buy a jar you help put an end to malnutrition in developing countries. Check out their website, www.yumbutter.com and get the lowdown. Asian Jazz Yumbutter is ground from peanuts grown in the US and blended with cumin, turmeric, cayenne pepper, garlic, sea slat, and love. I just received my first case at the Co-op (check out the deli cooler), and we've already sold several!! As you can imagine, it sparked visions of alternative peanut butter fillings for my homemade peanut butter cups.
I settled on peanut butter ground fresh here at the Cook County Whole Foods Co-op. You can't beat freshly ground peanut butter,or so I thought. (I will note that fresh ground peanut butter reacts very differently than other peanut butters. The flavor is remarkable, but it lacks the creaminess of jarred peanut butter. I thought it made the filling a little on the dry side, but the flavor was great. I would suggest using a creamy, all natural peanut butter from a jar. One of my favorite things about blogging about food is that it is one part writing, one part cooking, and one part chemistry. Some times recipes work out, and sometimes there is room for further exploration.) After my Yumbutter experience I knew I wanted to add some subtle spice to the peanut filling, and I settled on Garam Masala. This spice blend contains black pepper, cloves, cinnamon, cumin, and cardamon. The flavors make me think of apple pie, or spiced cider. I also wanted to make the filling sweet, but not too sweet. I settled on sweetening the peanut filling with honey. This gave the filling the sweetness it needed, and I flavor of the honey paired well with the Garam Masala. I should also mention that I used equal parts dark and milk chocolate, but you could use one or the other, depending on your preference.
Homespun P.B. Cups
8 ounces dark chocolate
8 ounces milk chocolate
3/4 cup creamy peanut butter
1/4 cup honey
1/4 tsp Garam Masala
1 tsp vanilla
1/4 tsp salt
Prepare a mini muffin pan with liners. The recipe yields one 24 count mini muffin pan's worth of P.B. cups.
Over a double boiler, melt the chocolate. Spoon a teaspoon full of the melted chocolate into each muffin cup and swirl it around with the backside of a small spoon. You want to get the chocolate up the sides, making sure you have a thick layer of chocolate on the bottom as well as the sides. (This part is the most involved, and I promise it gets better after this.) Allow the cups to harder in the fridge for about 10 minutes.
Prepare the peanut butter filling by mixing the P.B, honey, Garam Masala, honey, vanilla, and salt.
Place a spoonful of the filling in each cup, filling it about 3/4 full- leave enough space to cover with chocolate.
Spoon a half of a teaspoon or so of chocolate over the filling, sealing the filling in, finishing the chocolate cup.
Sprinkle tops with flakes of sea salt, or garnish with a roasted peanut. Allow to chill in the fridge until set, about 10 minutes. Share with friends, family, and radio hosts! Belly up!!
Tuesday, December 25, 2012
Friday, December 14, 2012
Sugar Cookies with Chocolate & Peppermint
 |
| the cutout cookie army |
 |
| the finished product! |
Sugar Cookie Cutouts with Chocolate & Peppermint
Cookies:
3 cups all-purpose flour
1 tsp baking powder
1/2 tsp salt
1 cup (2 sticks) unsalted butter, room temperature
1 cup sugar
1 large egg
2 Tbl sour cream
1 tsp vanilla extract
Topping:
bittersweet chocolate, melted
candy canes, crushed
Preperation:
Sift first 3 ingredients into a medium bowl. Using an electric mixer, beat the butter and 1 cup sugar in a large bowl and blend well. Add egg, sour cream, and vanilla, and beat for about 1 minute. Beat dry ingredients in 2 additions until just blended. Gather dough together, divide in half. Flatten each half into a disk, wrap in plastic and chill1 hour. (Can be made 1 day ahead. Keep chilled. Softened dough slightly at room temperature before rolling out.)
Line baking sheets with parchment paper. Sprinkle work surface and top of dough with additional sugar. Working with 1 disk at a time, roll out dough to 1/4 inch thickness (dough will be very soft). Using assorted 2 to 3 inch cookie cutters, cut out cookies. Transfer to prepared sheets, spacing 1 inch apart. Gather scraps and roll out on a sugared surface and cut out more cookies. Repeat until all the dough is used. Chill all cookies on baking sheets at least 15 minutes and up to 1 hour.
Preheat oven to 350 degrees. Bake cookies, 1 sheet at a time, until light golden at edges, about 12 minutes. Transfer cookies to racks and cool completely.
Melt with chocolate in a double boiler, being careful to remove the chocolate when it is almost done. Finish stirring the chocolate until it is smooth. Drizzle the cooled cookies with chocolate. Alternately, you could dip half of the cookie in the chocolate. Before the chocolate has cooled and set, sprinkle with crushed peppermint candy canes. Belly up!!
Monday, December 10, 2012
Espresso Shortbread
Christmas is very near. I become over-zealous about making homemade gifts around this holiday, especially ones that are to be eaten. I can't help it. To combat this craze, I have decided to blog away on as many edible gift recipes as I can. Everyone needs an outlet, right? I'll be tucking a jar of spiced white peach jam, which I blogged about back in July, into everyone's stocking this year. The spices of the jam; ginger, cinnamon, cardamon and allspice are warming and welcoming into the snowy holiday. I'll also be making dozens of cookies which will both overwhelm and over- sugar my family. One of my favorite cookies is shortbread. This versatile, buttery cookie can be a vehicle for many flavors, my favorite being espresso. Each cookie ends up tasting like a wonderful, sweet cup of espresso which I love so very much. Using ground espresso beans gives these cookies the intense coffee flavor and a delicate crunch.
Espresso Shortbread
1 cup unsalted butter, softened
2/3 cup confectioners' sugar
2 teaspoons vanilla extract
2 cups all-purpose flour
1/4 cup ground espresso
1/2 teaspoon sea salt
Using an electric mixer fitted with the paddle attachment, beat the butter and sugar until creamy and smooth, about 2 minutes. Add the vanilla and beat well. On low speed, mix in the flour, espresso, and salt until just combined Form the dough into a disk, wrap in plastic, and chill for at least 2 hours.
Preheat the oven to 300 degrees. Roll the dough between two sheets of plastic wrap or wax paper to 1/4 inch thick. Using a sharp knife, cut the shortbread into 2 inch squares and place them 1 inch apart on ungreased baking sheets. Prick the shortbread with a fork and bake until pale golden around the edges, 20 to 24 minutes. Cool completely on a wire rack.
To make chocolate dipped or chocolate drizzled espresso shortbread, melt 2 1/2 ounces bittersweet chocolate, remove it from the heat, and add another 1 1/2 ounces chopped bittersweet chocolate. Stir continuously until the chocolate is at room temperature. Dip each cookie halfway into melted chocolate, then place them on a wire rack and let stand undisturbed until the chocolate sets, about 2 hours.
Serve with a well made cup of java! Belly up!!
*these cookies may provoke a rowdy afternoon if consumed by children
Monday, November 26, 2012
Turkey, Kale, & Wild Rice Soup
Thanksgiving was wonderful, and I hope everyone had a marvelous holiday of eating and gathering with friends and family! I am so thankful for so many things! My family, my giddy and magnificent daughter, my soon- to- be husband, our new homestead, inches upon inches of snow, and succeeding in my life here in the northern most reaches of the north shore of Lake Superior to name a few things. I am also thankful for everyone who helped along the way, to get me where I am right now. Life is awesome and it somehow feels like it's only just beginning....
Leftover turkey is humble, yet most are grateful for it. It's versatility is endless. Turkey sandwiches are probably on the menu for many folks this week. I thought I'd add a new recipe to the leftover turkey category. I am forever trying to add an element of healthiness to our everyday eating which you'll get a glimpse of in the following recipe. We are a pretty healthy bunch, but there is always room for improvement. Eating real, whole foods is our main goal. Paying attention to quantity and quality. For instance, a whole pie may not be the best choice for breakfast. A slice would be better. But if you did over indulge in a whole pie, tomorrow is a new day. It's best if that pie is homemade and not some weird pastry made by a lady named Sarah Lee. I think that eating should be enjoyable, and balancing that factor with trying to stay in shape and eating well in the hustle and bustle of everyday life can be a challenge. I start by stocking our fridge with healthy choices. I seldom buy soda, candy, or packaged foods. If it's not available in our house, chances are greater that we won't be consuming it. I always have on hand plenty of fresh fruits and vegetables. They play a major role in my everyday cooking. It's easy to put together a recipe such as the following, when you have great ingredients on hand.
Turkey, Kale & Wild Rice Soup:
2 pieces of bacon, chopped (optional)
1 small onion, chopped
2 medium carrots, chopped
2 celery stalks, chopped
3 cloves garlic, minced
1 small sprig rosemary, minced
1 tsp dried thyme
1 tsp dried sage
6 cups chicken stock
1/2 cup white wine
2 cups left over turkey, chopped
2 cups cooked wild rice
1 small bunch kale, chopped
sea salt, to taste
black pepper, to taste
In a large stock pot, over medium heat, saute the bacon until crisp and golden. Remove the bacon from the pot, leaving the bacon fat. You can omit this step and start with a drizzle of olive oil in a large stock pot over medium heat. Add the onion, celery, and carrot to the fat or olive oil and saute about 5 minutes, or until the onions just begin to turn translucent. Add the garlic and the herbs and saute a few minutes more. Add the wine and deglaze the pan. Add the stock, turkey, and the wild rice and reduce the heat to medium low. Allow everything to simmer together about 10 minutes. Add the kale and simmer an additional 10 minutes. Taste the soup and adjust the flavors, adding sea salt and black pepper to taste.
Garnish the soup with fresh lemon zest, chili flakes, and/ or Parmesan cheese. A drizzle of toasted sesame oil and some fresh chives would be equally nice.
A few add ins to play around with; a cup of roasted cherry tomatoes, a variety of root veggies (parsnips and golden beets along with the carrots), or using a different grain in place of the wild rice such as red quinoa or barley. Have fun creating a wonderful bowl of soup! Belly up!!
Tuesday, November 20, 2012
Eat your way thru Thanksgiving!
As per request from the lovely pair of ladies whom I have the joy of chatting with on WTIP this morning, I have put together some tips, quick recipes, and menu suggestions for Thanksgiving. We tried to d-mystify the roasting of the bird, stuffing options, and what to choose for a side- questions on the air this morning. I think it went pretty well. We all felt a longing for roasted turkey and all the fixings in our bellies immediately after our Thanksgiving conversations!
The turkey. I view this big bird as I would a chicken. It's just bigger, and requires a bit of prep work before it gets roasted. I use a brine for the turkey. A brine can be as simple as 1 cup of salt and 1 cup of sugar per 2 gallons of water. You can modify the brine by steeping herbs and spices in the liquid, replacing the sugar for brown sugar, molasses, or maple syrup, or by switching up the liquids used for, say a 6 pack of Guinness or a flavorful chicken stock. If you have never brined before, stick with the simple recipe above. The brine will add moisture and flavor to your bird, so you can throw away the turkey baster. For a 14-16 pound bird, submerge the turkey, breast side down in the brine overnight. This can be done in a clean 5 gallon bucket stored in the fridge. The following morning, remove the bird from the brine, rinse inside and out, and place in your roasting pan. Preheat your oven to 500 degrees. Pat the turkey dry with paper towels, and liberally coat the skin with olive oil. You can put some aromatics in the cavity of your turkey at this point. Think sprigs of rosemary, sage, thyme, and maybe a lemon cut in half. Roast the turkey at 500 degrees for 30 minutes. Reduce the heat to 350 degrees and continue to roast the turkey until the internal temperature in the thickest part of the breast reaches 155 degrees. If the skin on the breast begins to brown too much, cover the skin with foil or strips of bacon.
The stuffing. If you have a tradition of cooking the stuffing inside the turkey then you should go for it. I prefer to bake mine in a baking dish for I can get a bread pudding like consistency with a buttery crisp top, much like a savory bread pudding. Here's a simple stuffing recipe:
Melt one stick of butter in a large skillet over medium heat. Add 2 cups of each diced onion and celery. Saute a few minutes, then add 1 tablespoon each minced sage, thyme, and garlic. Season with salt and black pepper and continue to saute until the onions start to become translucent. Add 3 cups of chicken stock to the pan and set aside. In a large bowl mix together 3 eggs and 1 cup of cream. Add 16 cups of cubed, stale bread, then pour in the veggie/stock mixture. Transfer to a buttered baking dish, dot with butter, cover and bake for 30 minutes at 350 degrees. Uncover the pan and bake until the top is golden, about 20 more minutes. To this simple stuffing recipe you can add in your favorites. I like crisped bacon and sauteed kale, or wild rice and goat cheese. You could also try sauteed apples or pears and toasted pecans.
The sides. I like to keep these pretty simple, or ask my dinner peeps to bring a dish to pass. Some easy options I'm planning on this year are horseradish mashed potatoes, sauteed brussel sprouts with blue cheese, and savory scones. The key to keeping the sides simple is to keeping the ingredients high quality. For the best mashed potatoes I use Yukon Gold potatoes for their buttery flavor. The brussels sprouts will roast in the oven with a simple drizzle of olive oil and sea salt with blue cheese crumbles added at the end of roasting. I prefer making savory scones not only because they are so buttery, flaky and delicious, but also because I never end up having the space or time to deal with yeast doughs.
Dessert. This year I am embarking on a pie marathon. Well, not really, but I am making several pies, and I plan on eating a piece of each, even if that means for breakfast the days following Thanksgiving. The key to a better pecan pie, toast and chop the pecans. Toasting the pecans brings out their flavor and chopping them disperses them evenly throughout the custard. I also like to substitute grade 'B' maple syrup for the corn syrup used in traditional pecan pie recipes. I have a plan for building a better pumpkin pie containing a layer of cheesecake, a layer of traditional pumpkin pie custard, and then topped with a crunchy- nutty stuesel. I'll keep you posted on this pie later.
Food and Wine magazine, 101cookbooks.com, food network, and many other resources will be available for you Thanksgiving day if googling assistance is needed. Remember that eating should be fun. Enjoy your Thanksgiving! Belly up!!
Tuesday, November 13, 2012
Shepard's Pie
As the snow comes and goes, I hardly notice as I sit in front of our wood stove, snuggled between a lazy Labrador and a sleepy four year old. It is this rare moment when I seize the opportunity to have total control of the television remote, and watch cooking shows. I know, I know, I usually read a book, but I have been deprived of television for nearly 10 years. I quickly make notes as I watch cast iron cooking, Greek cooking, some guy who travels around and eats grilled meat, and etc....Okay, it becomes mindless very quickly, and the fire is dwindling, and my four year old found a whoopie cushion, and so off goes the t.v., and back comes reality. I liked the ideas of the cast iron cooking show. I have a set of cast iron skillet, passed down from my grandparents, very well seasoned, and very ready to be used.
I settled on Shepard's pie. I had some ground lamb I had gotten from a barter a month ago. I love how bartering is so embraced in rural northern Minnesota. Give a friend a ride and swap some lamb meat. It has been a while since I have eaten lamb. I had forgotten how tender and delicious it is. I sauteed the lamb, then set it aside. I poured out all but a few tablespoons of the fat and left it in the pan. I then caramelized onions, celery, and carrots in the lamb fat. While the caramelizing was happening, I boiled equal parts cauliflower and Yukon gold potatoes in salted water. I really like eating cauliflower this way. The cauliflower adds a bit of earthy vegetable-ness, and the Yukon gold potatoes lend their buttery-ness to create a great mash to top the Shepard's pie with.
It all came together very easily. There were minimum spices; salt, black pepper, and some cinnamon in the lamb and vegetable mixture. I used freshly grated asiago cheese in the cauliflower/ potato mash, and topped the whole pie with extra grated asiago. I served it right out of the skillet, and it was the perfect ending to a busy, wintery day.
Shepard's Pie
1 pound ground lamb
1 onion, chopped
2 celery stalks, chopped
1 large carrot, peeled and chopped
2 cloves garlic, minced
1 Tbl flour
1 tsp cinnamon
3/4 cup red wine
1/2 cup chicken or beef stock
sea salt and black pepper to taste
The topping
1 pound fresh cauliflower, cut into medium florets
1 pound Yukon gold potatoes, large dice
4 Tbl butter
4 Tbl sour cream
1/4 cup Asiago cheese, grated
sea salt
You'll want to pre-heat the skillet on medium-high heat. Add the lamb and saute until golden brown. Remove the lamb from the skillet, and drain off all of the fat except a few tablespoons. Add the onion, celery, and carrots and caramelize until they are golden around the edges. Add the garlic, cinnamon and flour and saute a few minutes to caramelized the garlic and cook the flour a bit. Slowly add the red wine (I used an Australian Syrah), all the while slowly stirring. Add the stock, and give it one last stir making sure it is all combined. Turn the heat down to low, and allow the mixture to reduce a bit and for the flour to completely do its thickening, about 5 minutes. If the mixture seems too thick, add more stock. You also don't want the mixture to be too wet, or it will bubble and ooze out of the pan while baking in the oven. Give this mixture a taste, adding more cinnamon, sea salt, and black pepper to taste. Turn off the heat, and let this mixture hang out a few minutes while you mash the cauliflower and potatoes.
While all of the above is happening in your cast iron skillet, bring the cauliflower and the potatoes to a boil in salted water. Boil until fork tender, and drain. I used an old fashioned potato masher to mash the potatoes, cauliflower, butter, sour cream and cheese together. Add sea salt to taste. Carefully spread this mixture on top of the mixture in the cast iron skillet. I used an off-set spatula to make a smooth surface, sealing the edges. Top with grated asiago cheese, and bake at 400 degrees until the cheese starts to brown, about 8-10 minutes. Remove the pan from the oven, and allow it to cool for at least 10-15 minutes before you try to cut into it. Waiting that 10-15 minutes is the toughest part of this entire recipe. Your house will be warmer and fragrant from the lamb and cinnamon. I enjoyed this with a glass of the same wine I used in the recipe. Belly up!!
Tuesday, October 30, 2012
Indian Spiced Bean Dip
I've been on a curry kick lately. It's those warming spice blends that really help me get through the cooler temperatures. I decided that I wanted to make my own spice blend. When I did a quick search on the computer, I found more recipes than I could handle! Every region has its own spice blend. I suspect every family has its own blend as well. As with every family that shares recipes from generation to generation, I suspect curry blends are modified and adjusted to personal taste. I do the same thing with almost every recipe I come across. That means that you can create your own blend to your specific taste. I like that concept. The easiest recipe that I came across was courtesy of Alton Brown. It's a blend of six spices, toasted and freshly ground.
Alton Brown's Curry Powder Blend
2 Tbls whole cumin seeds, toasted
2 Tbls whole cardamon seeds, toasted
2 Tbls whole coriander seeds, toasted
1/4 cup ground turmeric
1 Tbls dry mustard
1 tsp cayenne
Place all ingredients in a container with an airtight lid. Shake to combine. Store in a cool dry place for up to 6 months. When ready to use, grind and add to dishes according to taste.
There. Pretty easy! Other spice blends include fennel seeds, paprika, ginger powder, chili powder, salt and a whole spectrum of spices from different regions of the spice trade route. As I mentioned, you can create your own blend to your preferred taste. Have fun with it. It will make your kitchen smell fantastic!!
I wanted to offer up a recipe for you to use your curry powder blend with. We've been making an Indian Spice Bean Dip here at the Co-op with excellent reviews. This recipe contains turmeric as well as the curry powder blend. Turmeric has been getting a lot of press lately with it's healing properties. It's been used as a natural antiseptic, for cancer prevention, liver detoxifier, as an anti- inflammatory, as a natural painkiller, and as an arthritis treatment. The list goes on and on. I think the key to maximizing the health benefits of any whole food is to combine it with a healthy lifestyle and healthy eating. That is easier said then done, so I'm happy to offer this recipe as one to incorporate more healthy eating into your lives. Belly up!!
Indian Spice Bean Dip
from Wheatsfield Co-op, Ames Iowa
4- 15 oz cans unsalted cannellini beans, drained
8 cloves garlic
1/2 cup olive oil
2 tsp sea salt
2 tsp black pepper
2 tsp tumeric
2 Tbls curry powder
Blend all ingredients together in a food processor until smooth, adding a small amount of water if mixture seems to thick. Enjoy!!
Tuesday, October 23, 2012
Curried Sweet Potato & Wild Rice Soup
We did it!! We purchased a homestead, and moved in! We installed a wood stove last weekend (thanks Dad), and it has added immense joy and much needed heat to take the edge off of these blustery days. The barn is lovely, and my daughter and I can't help but wander through the large wooden doors and into the grassy pasture in the evenings. She laughs as she runs through the tall grass, her curly locks bouncing in and out of sight as she goes. Life is pleasant.
Of coarse I just want to stay in and cook in our new kitchen. I've painted the dinning room a color called 'roasted beet', and I am in love with dinner time, and all of us seated around our table in our beet red room. It's cozy, sweet, and ours! One of the first things I cooked in our new kitchen was soup. A creamy, curried soup with sweet potatoes and wild rice. The spices in the curry were fragrant and warming. The wild rice, sweet potatoes, and coconut milk all had a presence in the soup, their flavors balancing into a delicious pot of soup!
Curried Sweet Potato & Wild Rice Soup
1 cup wild rice
4 Tbls butter
1 small onion, chopped
1 medium leek, cleaned and chopped
2 stalks celery, chopped
2 medium carrots, peeled & chopped
2 cloves garlic, chopped
2 large sweet potatoes
1 Tbls curry powder spice blend
1 tsp dried thyme
1 can coconut mik
6 cups vegetable or chicken stock
sea salt, to taste
black pepper, to taste
In a medium saucepan add about 3 cups of water and bring to a boil. Once the water is boiling, add the wild rice, reduce the heat to a simmer, and allow the wild rice to cook until it starts to split open. This will take a little while, maybe 20 minutes or so. Keep an eye on the liquid, making sure there is always liquid in the pot. It is fine to have liquid remaining as it is very tasty and can be used in the soup as a replacement for some of the stock. At this point, turn off the heat, leaving the wild rice and any remaining liquid in the pan, and set aside.
In a large stock pot over high heat, melt the butter. Add the onion, leek, celery and carrots and saute until the onions begin to become translucent. Add the garlic, curry powder and thyme and saute a few minutes more- to toast up the spices and cook the garlic a bit- be careful not to over- brown. Reduce the heat to medium-low. Stir in the sweet potatoes, the wild rice and the stock. Allow to simmer together for about 15 to 20 minutes, or until the sweet potatoes begin to soften.
Turn the heat down to low. Add the coconut milk and give the soup a taste. Add a hearty dose of black pepper and sea salt. At this point the soup should be creamy, slightly thick and hearty, and the flavors should all be present. If you like more curry flavor, add more curry. This recipe keeps if fairly subtle. A few add-ins I was thinking about were chopped apples, added when the sweet potatoes are added. You could also substitute a variety of winter squashes for the sweet potato. Belly up!!
Tuesday, October 2, 2012
Chorizo & Sweet Potato Hash
There is no denying that fall has arrived. The hillsides surrounding the harbor are crimson and gold. The deer have changed their hue from a reddish brown to a muted grey brown. The evenings are crisp, and mornings are even chillier. I feel the need to eat root vegetables. It's just what happens. It's a natural transition. I am also transitioning into heartier meals, the kind that sticks to your ribs and prepares you for the winter to come. We had a hike in mind the other morning, exploring the small peaks in Grand Portage and viewing the colorful leaves. I new we needed a hearty breakfast, and hash came to mind. I love the flavor combination of spicy, salty, smokey chorizo and the sweet, earthiness of sweet potatoes. I set out to make chorizo and sweet potato hash.
This recipe is a great addition to your cool weather collection. I combined sweet potatoes, buttery yukon gold potatoes, chorizo, and caramelized onions. I topped the hash with some over easy eggs and a small dollop of fresh goat cheese. Fresh chopped herbs such as sage or chives would be great too. You have to trust me when I say that this dish is easy to pull off. I had a few eager hikers pacing my kitchen, and was able to put this together without putting us behind schedule!
2 medium sweet potatoes, peeled and diced
2 medium yukon gold potatoes, scrubbed and diced
1 pound chorizo
1 small onion, diced
*eggs, optional
fresh cracked black pepper, to taste
Fill a medium pot with about 6 cups of water, place on high heat, and bring the water to a boil.
While you wait for the water to boil, prepare the potatoes and sweet potatoes. Once the water is ready, place the prepared potatoes and sweet potatoes into the boiling water and cook them fro about 5 minutes, or until they are just becoming tender. Strain the potatoes and sweet potatoes, and set aside.
In a large cast iron skillet or saute pan, brown the chorizo. Remove the cooked chorizo from the pan and set aside, saving the renderings in the pan. If there appears to be a lot of fat left in the pan, drain some of it off, leaving about 3 tablespoons. Add the onions to the pan, and allow them to caramelize.
Once the onions have caramelized, add the potatoes and sweet potatoes to the pan. Allow them to develop a nice browning before you stir them about the pan. I like to get a crisp edge on my potatoes, and it's easy to achieve if you let them start to brown before you shuffle them around the pan. Once the potatoes start to brown, add the chorizo back into the pan, and scramble all of the ingredients together in the pan. At this point your hash is done. I cracked a few eggs on top of my hash and placed the pan in a 400 degree oven, and allowed the eggs to cook for about 5 minutes. I garnished the whole lot with a few dollops of fresh goat cheese and a hearty amount of fresh cracked pepper.
Alter your hash recipes with what you have on hand. I was thinking that beets would be a great addition, or any root vegetable you may be harvesting form your garden. You could also serve this hash with a hearty amount of chili sauce and some warmed tortillas for a more 'on the go' sort of breakfast. Keep the ingredients top notch and the recipe simple. Belly up!!
Monday, September 3, 2012
summer highlights
Every summer I make a little vow to accomplish a list of things. My list consists mostly of silly endeavors such as eating as many peaches and as much melon as I possibly can this season. Check. Spending a little less time at work, and a little more time enjoying my daughter. Check. Exercise at least three times a week. Check. Swim in the lake more. Check. Buy a house, (almost there)! Smell the flowers. Check. Make jam. Check. Make pickles. Check. Sneak in a bit more beach time. This is a tough one, as there is never enough beach time. Time on the beach can mean lazily meandering along the shore, occasionally throwing a stick in the lake for our old dog to fetch, and collecting heart shaped rocks. Beach time can include swimming, rock skipping, or lounging on the warm rocks while soaking up the sun. One of my favorite beach times this summer was a week ago on my birthday. I enjoyed the evening with my family and three lovely and great ladies- Kate, Aria, and Bryn. We made a fire, roasted hot dogs, and ate figs as the moon rose. Kate inspired me as she prepared fire roasted figs on a stick. What a wonderful idea! The figs get roasty, warm, and sweet. There is no recipe, just a great concept. I might try stuffing the figs with slightly softened goat cheese in the future before I roast them, or pair them with some really dark chocolate. It was such a simple and perfect treat. As the fire dwindled, the moon's reflection mirrored Lake Superior's surface, and my daughter curled on my lap, I felt one hundred percent contentment.
Another summer favorite was a watermelon cocktail. My future in- laws were up for a visit, and brought us a 30 pound watermelon grown by their neighbor. It was sweet, delicious, and it helped me achieve one of the top things on my list; eat as much melon as possible. Even though I was trying to eat as much melon as I could, there was still a lot of melon left to be consumed. I threw my conundrum to my co-worker Kim, thinking she'd have some ideas as to how to use up some of that melon. Her suggestion; juice it, mix it, and drink it on the rocks. For one of the most refreshing drinks I have ever had, I did the following:
Juice, or puree and strain about 5 pounds of watermelon. You'll be left with about 6 cups of juice.
Juice of 1 lime
1/4 cup agave nector
Combine the above ingredients, adding more or less lime juice and agave to your liking.
Fill an eight ounce glass with ice. Pour one shot of vodka over the ice. Top with the watermelon juice. Sip and enjoy.
I have one more summer greatness that I'd like to share. Sweet refrigerator pickles. My daughter and I are fairly particular about our pickles. I made a batch of sweet gherkin pickles with good results, but I didn't really enjoy the four day process that came with them. I'm usually strapped for time, and these pickles, as great as they are, almost put me over the edge. I was curious if I could create a simple refrigerator pickle with as much flavor and greatness of our high maintenance gherkins. I pulled it off with this recipe:
2 medium cucumbers, thinly sliced
1 cup water
1 cup cider vinegar
1 1/2 cups sugar
1/2 tsp mustard seeds
1/2 tsp celery seed
1 tsp allspice berries
1 tsp pickling spice
Place the cucumbers in a clean spring- top jar.
Combine the remaining ingredients in a non-reactive saucepan and bring to a boil. Simmer for 4 full minutes to wake up the flavors of the spices.
Slowly pour the hot pickling liquid over the cucmbers, completely filling the jar. Allow the pickles to cool to room temperature before topping off with any remaining pickling liquid. Refridgerate.
Refrigerate the pickles for a week to ripen. They will keep for about 2 months in the fridge. Belly up!!
Monday, August 20, 2012
Summer Squash & Ricotta Cheesecake
It has been a hustle and bustle month for me. Amongst many things, we are in the midst of buying a farm. It is a process, but the end results will be amazing. Wide open spaces are a bit rare in Cook County Minnesota, so when we stumbled upon an old family farmstead, over looking Lake Superior, with a near 10 acres it was instant love. I am looking forward to growing more of my own food. I am constantly flipping through seed catalogs searching for seeds that are better suited for this sometimes unruly northern climate. I have also been stock piling recipes to put my produce to work feeding my family. I found this recipe, originally a zucchini cheesecake recipe, and decided to give it a try. I had a beautiful specimen of a summer squash, bright yellow and unblemished, and it wanted to be a star. I think of this recipe as a base recipe, meaning the flavors are calm and not too pushy. It's a great base for adding flavors to. I went with fresh basil, sun-dried tomatoes, and scallions to flavor the cheesecake. Any fresh herbs would work nicely, and bold flavorful add ins will accentuate the subtle flavors of the summer squash and ricotta. Think roasted corn and chipotle peppers, or rosemary and bacon, or toasted almonds and poblano peppers. Endless possibilities for a future endless bounty of summer squash. Belly up!!
2 cups summer squash, unpeeled & grated
1 tsp sea salt
2 1/2 cups ricotta cheese
1/2 cup shredded Parmesan cheese
1/2 bunch of scallions, chopped
2 cloves garlic, chopped
1/4 cup fresh basil, chiffinade
1 Tablespoon lemon zest
2 Tablespoons sun dried tomatoes, chopped
3 large eggs, well beaten
1/3 cup goat cheese, crumbled
drizzle of olive oil
Preheat oven to 325 degrees. Butter/ oil a 6 inch spring-form pan. A 6 inch spring- form pan is kind of a rare size, so a tart or pie pan would work too.
In a strainer, toss the shredded summer squash with the salt and let sit for ten minutes. Now aggressively squeeze and press out as much moisture as you can. Set aside.
In the meantime, combine the remaining ingredients in a medium bowl, and mix until well combined. Fold in the summer squash. Fill the springform pan with the ricotta- squash mixture and place on a baking sheet. Bake for 1 hour- 1 hour and 20 minutes or until the cake barely jiggles in the center (it will set up more as it cools).
Remove from the oven and let cool 5 minutes, then release the cake from its pan. Cool completely, serve at room temperature with a bit of olive oil drizzled on top.
This cheesecake is made with ricotta, so the texture is going to be different than a traditional cheesecake. We ate slices of this for appetizers, and I think this would be really great baked in a crust of some kind- maybe a cornmeal pie crust?....
Monday, August 6, 2012
Garlic Scape, Rainbow Chard & Sweet Corn Spoon Bread
I love August. Not only is it my birthday month, but it also resembles summer coming to an end in northern Minnesota. A month to soak up as much sun as possible, swim in Lake Superior a few more times, and a time to eat sweet corn. I made a point at the beginning of summer to indulge in as much fresh melon and peaches that I could possibly stand. I was successful, and now I am applying the same rule to sweet corn. Seasonal produce is, well, seasonal. It is at it's peak in flavor during it's peak harvest time. To achieve maximum satisfaction, you need to eat produce while it's in season. Sweet corn is ready!
I was trying to put together some new recipes using sweet corn. Something substantial. I was given a basket full of garden veggies a few days ago when I did a favor for a friend. What was left in the basket were garlic scapes, rainbow chard, and jalapeno peppers. I like the idea of all of these ingredients co-mingling with my sweet corn. I thought about a warm salad with a bacon vinaigrette. That would be AWESOME, but I was out of bacon. I was thinking about corn bread, but I wanted something custard- y. I finally stumbled upon a corn spoon bread recipe. Spoon bread is like a hybrid of cornbread, grits, and a souffle. It's an old time southern dish made with cornmeal, and is actually more like a pudding than a bread. It is soft and custard-y, and can be served and eaten with a spoon. The addition of rainbow chard seemed to keep this dish in line with it's roots as collard greens are a common add in.
Garlic Scape, Rainbow Chard & Sweet Corn Spoon Bread
1 Tablespoon butter, plus more for the baking dish
2 cups milk
1 1/2 cups sweet corn kernels
2/3 cup yellow cornmeal
coarse salt
pinch of cayenne pepper
1 cup sharp cheddar ( I used a sharp, raw milk cheddar)
1/2 cup garlic scapes, chopped
1 jalapeno, diced
1 cup rainbow chard, chiffinade
4 large eggs, separated
Preheat oven to 400 degrees. Butter a 2- quart souffle or casserole dish; set aside. In a medium saucepan combine butter, milk, corn, cornmeal, 1 teaspoon salt, and cayenne. Bring to a boil; reduce heat to medium, and simmer, stirring frequently, until mixture is slightly thickened, 3 to 4 minutes. Remove from heat, stir in cheese, garlic scapes, rainbow chard, and jalapeno. Let cool until just warm to the touch, about 15 minutes. Stir in the egg yolks until combined.
In a clean mixing bowl, beat egg whites and a pinch of salt until soft peaks form. Stir 1/3 of the whites into the cornmeal mixture until combined, then gently fold in the remaining whites with a rubber spatula. Pour into prepared dish.
Place dish in oven; reduce heat to 375 degrees. Bake until browned on top but still slightly loose in the center, 25 to 30 minutes. Let cool 5 minutes before serving. Belly up!!
Monday, July 23, 2012
Wild Berry Dutch Pancake
It brings me such peace and joy to spend the early hours of my weekend mornings, with my sweet darling and her four year old personality. She's the first one to rise out of bed every morning, and the first smiles of my day are plastered to her giggling face as she tries to pull me from my cherished sleep. She is so eager to jump into the day, and not wanting to stand in the way of such enthusiasm, I muster up all that I've got and get to it. If the sun is shinning, then we head outside. We water the garden, walk down to the beach to skip rocks and dip our toes in the water, or pick wild berries that grow along the ridges surrounding our house. I forget about the attention span of a young child, and before long Addie is running through the sprinkler as I finish up the berry picking. I hardly mind. There is nothing that could disturb the moment. As I switch to drinking coffee in a lounge chair, my darling secretly eats wild berries which is evident by her blue fingerprints. She then reminds me that it's a pancake morning, and we get to it.
I'm always game for a new pancake recipe, and so when I stumbled upon a recipe in Bon Appetit, I was curious. The recipe is originally called Peach Dutch Baby Pancake with Cherry Compote. The name alone was a challenge for Addie. The objective of the recipe was to utilize seasonal peaches and cherries. We had wild berries. I skipped the compote part of the recipe. I wanted the berries in the pancake. This pancake is one that requires a preheated oven, a preheated skillet, and about 20 minutes of baking time- no flipping necessary. This recipe was easy to put together, and the finished cake reminded me of an eclair shell filled with berries and drizzled with maple syrup. Yum!
the Pancake:
Preheat the oven to 425 degrees.
In a blender combine the following ingredients;
2 Tbls butter, melted
4 large eggs
3/4 cup flour
3/4 cup whole milk
1 Tbls sugar
1 tsp vanilla extract
1/4 tsp kosher salt
Blend batter until smooth, then set aside.
Heat a cast iron skillet over medium heat. Add;
2 Tbls butter
2 Tbls sugar
cook, stirring constantly, until sugar starts to caramelize, about 2 minutes. Add about 1 1/2 cups wild berries to the skillet and turn off the heat. Pour in the prepared pancake batter evenly over the caramelized berries and transfer to the oven.
Bake the pancake until puffed and golden brown all over, 17-20 minutes (it will deflate as soon as it's removed from the oven). Dust with powdered sugar and serve immediately, with a drizzle of maple syrup or honey. Belly up!!
Tuesday, July 17, 2012
Spiced White Peach Jam
At the food co-operative where I work, we have an abundance of stone fruit right now. It is so ripe and ready, that you can't pass them up for another day! It happens sometimes though, that folks decide to buy peaches later in the week, and those peaches that are ready, just don't wait. So when my co-worker handed me a half of a case of bruised but perfectly ripe white peaches, I couldn't say no. It wasn't possible. The peaches wouldn't allow it. Besides, I had been thinking about peach jam. Opportunity just presented itself.
White peaches are similar in flavor to your everyday yellow peach, but with a bit of a mild honey, floral, and melon flavor. When eaten in their perfect ripeness the juice flows down to your elbow, and the flavor is exceptional! Since I was going to be working with white peaches, a touch more unusual than yellow peaches, I wanted a jam recipe that was a touch unusual as well. Peach jam is wonderful, but I wanted to add some other flavors that would highlight the white peaches. Brown sugar, ginger, and dark rum came to mind. With those flavors I kept thinking about the tropics and the spice trade, and so cardamon, cinnamon, and allspice made there way in as well. It all worked together very well, and I was happy with the end result!
Spiced White Peach Jam
4 cups white peaches, peeled, and chopped
6 1/2 cups granulated sugar
1 cup brown sugar
1 lemon, zested and juiced
1/2 tsp cardamon
1/2 tsp cinnamon
1/2 tsp allspice
1-1 inch chunk of fresh ginger, peeled and grated
1/4 cup dark spiced rum
1 Tbls butter (optional. it helps remove the foam)
1 package of liquid pectin
Prepare the fruit. In a large stock pot combine all of the above ingredients except the liquid pectin. Bring those ingredients to a rolling boil (a boil that keeps on boiling while you are stirring it). Add the liquid pectin, and continue to stir at a rolling boil for 1 minute. After 1 minute turn off the heat and ladle jam into prepared jars. Process in a water bath for 10 minutes. Remove from the water bath, and allow to cool to room temperature. Share a jar with your neighbors and friends. Trade a jar for some freshly baked bread, and slather away! Belly up!!
Monday, July 9, 2012
Grilled Turmeric & Lemongrass Chicken

This week I thought I'd try a recipe I came across in my newest Bon Appetit magazine. There I found inspiration with an article on Malaysian cooking. The author had learned while in Malaysia, he could transform a marinade into a basting liquid, then reduce it and serve it as a dipping sauce. This method not only utilizes all of the marinade through the different stages of cooking, but it also ensures a depth of flavor with all of the layering going on. The marinade goes together easily in the blender, the chicken marinates overnight, and the next day there is minimal cooking required. The recipe calls for chicken wings, but I substituted chicken thighs. I'm thinking that this might be a great way to go about turkey legs in the future. Or pork. Or fish. Or tofu.
Grilled Turmeric and Lemongrass Chicken:
1 cup canned unsweetened coconut milk
3 shallots, chopped
3 garlic cloves
2 lemongrass stalks, (bottom third only, tough outer layers removed), finely chopped
2 jalapenios
1 1" piece of ginger, peeled and chopped
2 Tbsp fresh lime juice
2 Tbsp tamarind juice concentrate (not paste or pulp) or 1 Tbsp fresh lime juice
1 Tbsp fish sauce
2 tsp kosher salt
1 tsp tumeric
Combine all of the above ingredients in a blender with 1 cup of water, and puree until a smooth marinade forms.
Place 3lbs chicken wings or thighs in a large baking dish. Pour marinade over; turn chicken to coat evenly. Cover chicken and chill overnight.
Remove chicken from marinade, shaking any excess marinade back into the dish. Transfer chicken to a large platter. Let stand at room temperature for 15 minutes.
Transfer marinade to a large saucepan and bring to a boil over medium heat. Reduce heat to medium-low and simmer, stirring occasionally, until marinade thickens, 10-15 minutes. Pour half of marinade into a small bowl; set aside for basting chicken while it grills. Keep remaining marinade in saucepan, cover and keep warm until ready to serve the chicken.
Build a medium fire in a charcoal grill, or heat a gas grill to medium- high heat. Oil grill grates to prevent sticking. Grill chicken, turning every 5 minutes or so and basting occasionally with marinade in samll bowl, until fat is rendered and skin is nicely charred in spots, 30-35 minutes. (The key here is to turn the chicken often so the skin doesn't burn.)
Continue cooking chicken without basting (so it will get crsip) until chicken is cooked through, about 10 minutes longer.
Transfer chicken to a large platter and let it rest for 5 minutes. Squeeze lime wedges over wings. Transfer marinade to a small bowl. Serve warm marinade alongside chicken as a dipping sauce.
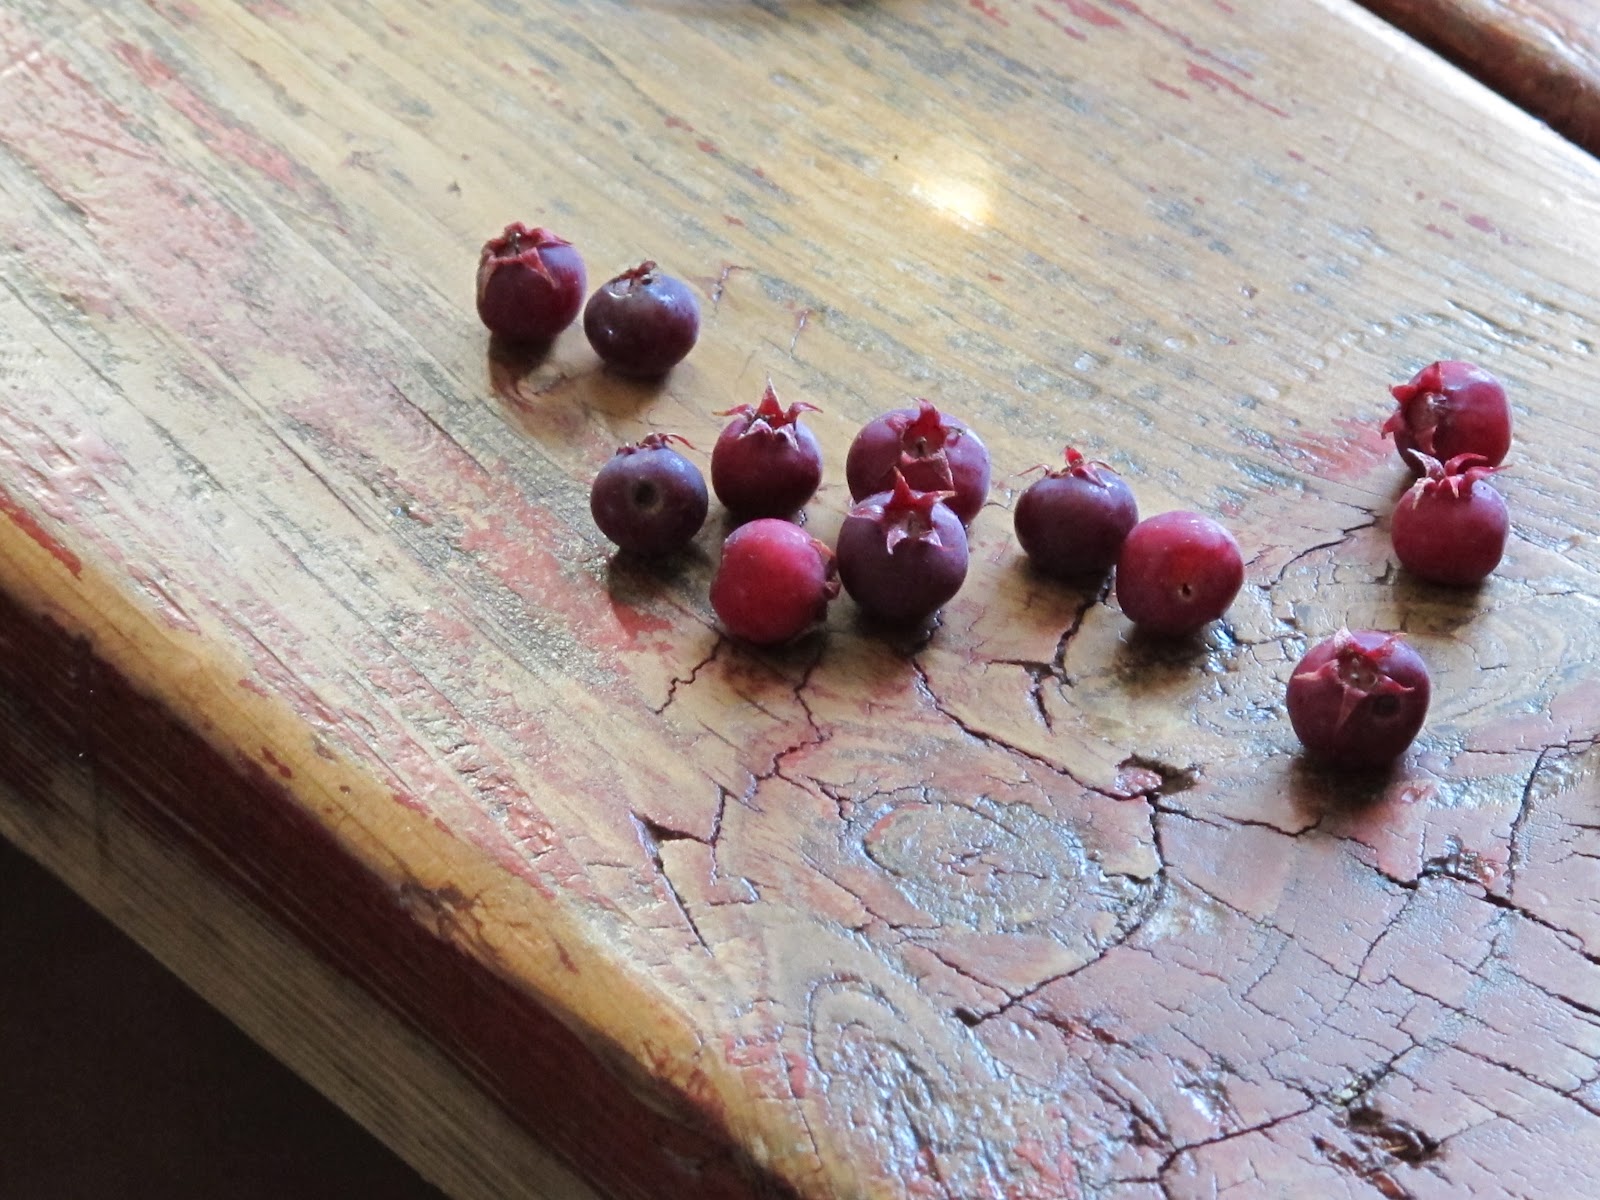
P.S. I thought I'd share a pic of our dessert that followed. A handful of Saskatoon berries picked from the back yard, er, forest. Also called June berry, Pigeon berry, or Service berry, these berries are native in North America from Alaska across much of Western Canada. With a sweet nutty flavor the fruits have long been eaten by Canada's aboriginal people, and is a well known ingredient in pemmican. Saskatoon berries are becoming more known as a super fruit for its nutritional value and health benefits. I think they go well with dry bubbly wine! Belly up!!
Tuesday, June 12, 2012
Addie's Buckwheat Buttermilk Flapjacks

Addie's Buckwheat Buttermilk Flapjacks:
1 cup buckwheat flour
1 cup whole wheat pastry flour
1 tsp baking soda
1 tsp salt
Whisk together all of the above ingredients in a medium sized batter bowl. In a separate bowl mix together:
2 cups buttermilk
1/4 cup butter, melted
2 eggs
3 Tbl maple syrup or honey
Combine the wet and dry ingredients until just combined. Fold any additional fruit as well, about 1 cup worth. A great cast iron skillet works great for cooking a few pancakes at a time. You want to cook the cakes over an even and consistent heat source. Make sure the pan is pre-heated correctly, or you'll end up with pancakes that spread too much and not rise well.

I am really interested in the variety of flours that are now available. Switching up the flours in your recipes can add wonderful flavors. It can be as simple as swapping half of the all-purpose flour in your chocolate chip cookie recipes, with whole wheat pastry flour. It adds a slightly nutty flavor with a honey-sweetness undertone. I bought a cookbook called, "Good to the Grain", written by Kim Boyce. Each chapter features a variety of flour. From Amaranth flour to Buckwheat flour to Spelt flour, this book includes many great recipes. I enjoy this book the most because it seems built on the fundamentals of utilizing these great grains for their unique flavors, and the end results are tasty! Typically when I see multigrained recipes those grains are used as substitutes to make baked goods either healthier or gluten- free, which isn't always a tasty end product. There is a forward written by Nancy Silverton in the beginning of the book, and she sums it up perfectly by writing the following: "My priority as both a baker and an eater is not health but flavor. What makes the recipes in this book so special is that- weather you care about whole grains or not- they are truly delicious." That makes me smile.
Here is an easy mulitgrain flour blend recipe that is included in 'Good to the Grain':
1 cup whole wheat flour
1 cup oat flour
1 cup barley flour
1/2 cup millet flour
1/2 cup rye flour
This recipe was designed to be versatile. You can also experiment with blends of your own. Kim says to keep in mind that every flour is different and has different qualities, so your goal is to create the right balance of flavor and structure. This blend would make wonderful pancakes! Belly Up!!
Monday, May 28, 2012
Northern Pike Tacos

The flesh of the Pike is white and mild tasting, and over the years the previously mentioned college pals have learned how to fillet the fish around the "Y" bones, leaving an almost boneless fillet to work with. And with a little research, I learned that Pike has quite a history in cuisine. I vaguely remember a puree of northern pike which we created in culinary school. We added cream, herbs, and spices, formed the mixture into quenelles, and lightly poached them in flavorful fish stock we had made from the fish carcasses. Yeah, I certainly wasn't going to attempt that project on a weeknight, after working all day, with a young child and a Labrador retriever to wrangle. When was the last time I shaped anything into a quenelle anyway? My days as a Chef seem so long ago.....so, I decided on Northern Pike tacos. I marinated the flesh in lots of cumin, garlic, and lime. I used the zest and juice of the limes which gave the fish an almost ceviche quality. What I mean by ceviche, is that the acidity of the lime juice started 'cooking', or breaking down the fresh Pike meat. It really infused the flavors into the meat, which made for tasty fish with minimal effort. I then fired up the grill and grilled corn tortillas alongside the marinated fish. I assembled each taco with a slather of fresh made guacamole and fresh cilantro. It was fabulous. No children or dogs were injured in the pre-dinner wrangling, and all bellies were full. The end. Belly up!!
Marinade for fish:
3 cloves garlic
2 limes, zested and juiced
2 tsp ground cumin
1 1/2 tsp kosher salt
1 tsp fresh cracked pepper
1/4 cup tequila
1 lb. fresh fish
Place all of the above ingredients, except fish, in a food processor and process for about 45 seconds. Place the fish and the marinade in a 1 gallon sized zip-lock plastic bag. Gently squeeze the bag to remove any excess air before sealing the bag closed. Place the bag of marinating fish in the fridge for about an hour. Remove from fridge, place on pre-heated grill, and grill for about 2-5 minutes on each side (depending on fillet size), making sure not to over-cook the fish.
Pair fish with grilled corn tortillas, fresh guacamole, fresh cilantro, and any other fix'ns you desire: thinly sliced cabbage, radishes, and/ or onions would be nice. Grilled peppers and goat cheese would work too!!

Monday, May 14, 2012
Mama's ribs
Happy Mother's Day Mom! Happy Mother's Day to all the Moms out there. I was going to cook something dainty and sweet this weekend for Mother's Day. Then I realized that women dig foods that are hearty and robust just as much as any guy I know. Plus, I am madly in love with a carnivore addict, and he brings out the 'pit- master' side of me. I settled on ribs. I bought a full rack of pork ribs, rubbed them down with a very simple rub, seared them on the grill, allowed them to slowly roast in the oven with beer, and then finished them on the grill slathered with sauce! Sounds a little putsy? Well, maybe, but that's kinda what I have grown to love about BBQ.
First the rub. The rack I had bought was a bit too big to fit on our grill, so I started by halving the rack. Then I sprinkled each side with sea salt, lots of fresh cracked pepper, brown sugar, and chili flakes. I wanted a touch of sweetness and lots of kick, hence the hefty sprinkling of fresh cracked pepper. The chili flakes add additional spice, different from that of the black pepper, and could be omitted depending on your personal taste. Normally I go a little nuts coming up with spice blends, but I kept it simple this time. Cumin, smoked paprika, allspice, cocoa powder, and ginger would be great additions. Play around with it. You'll probably come up with something really interesting. I allowed the ribs to hang out, all rubbed in spices, while my fella and I went for a 6 mile hike around the Devil Track River.
The searing. When I cook ribs, I go to the braising method. Braising is a combination cooking method using both moist and dry heat. Typically the food is seared over high heat and then finished in a covered pot with liquids. Pot roast would be an example. So, I seared the ribs on the grill so they would have the smokiness and a bit of the charred edges, which I am fond of. Just before I removed the ribs, I brushed them up with apple cider vinegar. Then I removed the ribs from the grill, placed them in a roasting pan with 2 cups of chicken stock, and 1 Sam Adams Cherry Wheat beer. This particular beer was left behind from a seasonal sample pack of beers. While it may not be my favorite drinking beer, it's cherry notes worked perfectly with the pork. Hard cider would be a good choice too. I let them roast for about 1 1/2 hours.
The finish. Remove the ribs from the roasting pan, and place them on a preheated grill. I like to add more smoky depth and crisp up the exterior a bit at this point. Now is a good time to slather on BBQ sauce if you like, and allow it to grill into the meat. Below is a run down of the BBQ sauce I came up with.
Remove the ribs from the roasting pan, and you are left with about a half of a cup of reduced liquids. This stuff is gold. Place the roasting pan on the burners of your stove top. De glaze the pan with a splash of red wine or beer, whatever you happen to be drinking. Scrape up all the bits and juices. To this pan add:
2 Tbl apple cider vinegar
2 Tbl agave (honey or maple syrup would do wonderfully)
1 Tbl stone ground mustard
1 Tbl chili powder
1 tsp chili sauce ( I used Sriracha)
1/2 cup ketchup
fresh cracked black pepper, to taste
smoked sea salt, to taste
Whisk all of the above ingredients together with the pan juices. If it seems too thick, add more liquids to thin it out. Here again, I encourage you to create this to your own tastes. Everyone's palette is different. Maybe some of you like more tang. Up the vinegar.You've got a sweet tooth, up the sweetener. I kept it simple again, and kept with the black pepper and chili spices. I try to balance the sweet, smoky, tang, and spice. Hope you enjoy! Belly up!!
Monday, April 30, 2012
Ocean Harvest
When returning home from an adventure, I usually take my time in reminiscing. Thinking over the smallest but usually most wonderful details. I was thinking about my most recent visit to the warm and wonderful, Florida. I was in or on the water everyday, the water being the Atlantic Coast and the Gulf Coast. I paddled kayaks and paddle boards. Enjoyed the quiet sail aboard a catamaran, and perused the coast in a fishing boat. I ate epic portions of seafood, all of which was caught fresh right under our noses. We ate grilled gulf shrimp, Jamaican jerk hog fish, conch ceviche, conch fritters, fresh tuna salad, stone crab claws, blue crab cakes, amazing lobster bisque, and the best smoked fish dip I have ever tasted. This smoked fish dip was made by a very magnificent woman named Theresa. She has Minnesota roots, but has been in Key West for years now. We stayed with Theresa and her husband Mitch, a fishing guide. Mitch took us fishing out on his boat one day, and it will be tough to beat that fishing trip. I never landed the monstrous Tarpon that I was fishing that day, but I had one on my line long enough to realize that the strength and endurance in the genetics of this fish might just outweigh my own. I was lucky to have had this experience, and even more lucky to have watched as hundreds of Tarpon rolled past our boat as they migrated into the keys. I have never seen such large schools of fish! Unfortunately their appetite dwindles after their long migration, and they spend most of their time filling their air bladders full of oxygen, which is how they breathe. If they aren't allowed to access to the surface, they will die as they are air breathers. I sat in that boat with my wind tasseled hair and sun-kissed skin, reflecting on my journey. How vast and wild the ocean can be reminds me of the great Lake Superior. The specimens lingering below the surface, the waves keeping me in suspense, and the joy of being on the water is still an unbeatable joy I cherish.
Smoked fish is a staple here in Grand Marais. Smoked by local fisherman, with their fresh catch of the day, it is impossible to beat. I was just in the local fish market where they had fresh smoked salmon, whitefish, and cisco. We are often given smoked fish from our neighbor, right out of the smoker, lightly glazed with maple syrup they've made themselves as well. It's the most incredible treat. We usually eat it straight up, but if there are leftovers, we made smoked fish dip. You can slather this dip on crackers, bagels or toasted baguette slices. It is also great dolloped in scrambled eggs or avocados. There are a slew of ways to alter the recipe, but here's how we do it:
1 pound smoked fish, cleaned (skin removed, de-boned, and flaked)
2 Tbl fresh chopped chives or scallions
1/4 cup greek yogurt- the unsweetened variety
1/4 cup mayo
generous pinch of cracked black pepper
Mix above ingredients together. If the mixture seems dry, add a bit more mayo. It's all about personal taste like I mentioned before. If you had some garlic scapes, they would make a great substitution for the chives. Some folks really like fresh dill and/ or fresh tarragon in the mix as well. Those would make great additions! I've just been keeping the recipe very simple since the ingredients are superb. Belly up!!
Monday, April 2, 2012
Chocolate Bundt Cake
I came across a chocolate bundt cake recipe from 101cookbooks.com. The author talked about how well the cake seemed to hold up during some traveling, a feature that I love to discover about foods. If it travels well, then the chances of me tucking into my backpack and going for a stroll are very good. I love having homemade treats to share with a friend as we sit on a park bench and watch the seagulls.Or as we sit atop a boulder, legs dangling below, and enjoy a sunset. This cake, once completely cooled, frosting set, and cut into thick wedges does travel pretty well. It certainly wouldn't withstand a rigorous back country backpacking trip, but a day hike or a road trip would welcome this cake!
I had a thick, chocolatey, spiced stout in my fridge which aided in my a hankering for this chocolate cake.
The cake calls for simmering stout or porter into a slightly thicker and reduced syrup. You then blend the stout with a hefty amount of cocoa and a not so hefty amount of butter which creates a fantastic, chocolatey cream to fold into the cake batter. The cake is sweetened with a dark brown sugar, which yields the highest percent of molasses, and honey and/or maple syrup. You could skip the brown sugar and increase the honey or maple syrup if you'd prefer. The cake also uses a blend of whole wheat and all- purpose flour, which I really like. You could use one or the other flours in full quantity as well.
Chocolate Bundt Cake:
2 cups porter or stout
8 Tbl butter, plus more for the pan
3/4 cup natural cocoa powder
1 cup whole wheat flour
1 cup all-purpose flour
1 cup dark brown sugar
1 1/2 tsp baking soda
3/4 tsp sea salt
3 eggs
1 1/2 cups plain whole yogurt
3/4 cup maple syrup or honey
Chocolate Buttermilk Icing:
3/4 cup powdered sugar
1/4 cup natural cocoa powder
2 Tbl buttermilk
Preheat oven to 350F/ 180C, with a rack in the center of the oven.
Butter and flour (generously) an 11 or 12 cup capacity bundt pan (or equivalent). You can bake this in other cake pans, just be mindful to avoid filling the pan(s) more than 2/3- 3/4 full. Adjust the baking times as well- baking until the cake begins to pull away from the sides of the pan, and the center tests clean when you insert a knife.
In a saucepan simmer the beer down to 1 cup. Remove from heat, add the butter and stir until melted. Stir in the cocoa powder, mixing until smooth, then set aside to cool, stirring occasionally to let off heat.
In a medium bowl, whisk together the flours, sugars, baking soda, and salt. Set aside.
In a large mixing bowl, combine the eggs, yogurt, and maple syrup or honey. Whisk well, until nicely blended and uniform in appearance. Gradually add the (cooled) stout mixture, stirring all the while. Stir until well blended. Add the flour mixture, folding until just blended, using as few strokes as possible.
Transfer the batter to the prepared pan and bake for 35-45 minutes if using the bundt pan, or until a knife inserted in the center comes out clean. You really don't want to over bake this cake- err on the slightly moist side if anything. Remove from the oven, and turn out onto a cooling rack after several minutes.
In the meantime, make the icing by whisking together the powdered sugar, cocoa, and buttermilk. Really go at it for at least a minute. The icing should end up smooth and creamy looking, adjust with a touch of powdered sugar or a few drops of buttermilk if you want to tweak the consistency at all. When the cake is completely cool, run the icing around the top with an offset spatula and let set. I actually frosted when the cake was still warm, so the icing oozed down the sides of the cake a bit. I preferred this over just a layer of frosting over the top, but either way is great!
Serve sprinkled with a bit of flaky sea salt. Belly up!!
Tuesday, March 20, 2012
Green Bean Salad with Pictures!

At the time of juggling Patisserie, Italian Bistro, and also my life, I met Tina. Tina was a talented pastry chef and had worked at both the Patisserie and the Italian Bistro, although not at the same time. She had the same thought patterns when it came to food, so we were always challenging each other with flavor combinations and new ideas. Tina was married to Ed, and sometimes when we weren't working, we would go out. This meant that we usually went to a bowling alley to bowl and drink beer or to an Irish Pub to, er, show our support for JFK. It was a fantastic era of my life. In that era I had also matted my hair into dreadlocks. Probably because I didn't have time for grooming. Together we would talk about food, which would then lead to talking about work. The owner of the Italian Bistro was very Italian and there was always an Italian relative within arms reach, (and usually wearing a baby blue colored suit and sunglasses). I didn't ask questions. I just made sure that the pasta was al dente. Tina and I thought this was awesome! Tina and I swapped a lot of recipes. One recipe that I am very grateful for is her green bean salad. Fresh green beans, toasted nuts, some variety of salty cheese, and a simple lemon vinaigrette. Although Tina and Ed now live on the west coast, and I now live on the north shore, I still have our great memories.
I wanted to keep this recipe simple, and just really feature the ingredients. A Meyer lemon vinaigrette paired with toasted pine nuts and Manchego cheese turned out to be a great combination. As you may have noticed, there are some fantastic photos of this salad with Lake Superior lounging in the backdrop. These are thanks to Stephan Hoglund and his amazing photography skills. During this photo shoot, I ended up altering the salad a bit and adding fresh chiffinade of basil and heirloom cherry tomatoes. These ingredients were great additions to the salad. To be honest though, I would've liked to add more seasonal ingredients such as delicate pea shoots or shaved radishes. These seasonal items weren't available so I improvised with great results. If you live somewhere near a metro area or a farmer's market, any seasonal produce shine.
Green Bean Salad-
1 lb fresh green beans, trimmed
1/3 cup pine nuts, toasted
1 Tbls basil, chiffinade
1 cup heirloom cherry tomatoes, halved
Manchego cheese, shaved
Blanch the green beans in salted, boiling water. I cooked them for about 5 minutes, and then immediately submerged them in ice water. This makes the beans vibrant green in color, but more importantly they remain crisp and firm, which is how I prefer them.
Toss the green beans, toasted pine nuts, basil, tomatoes, and Manchego together in a large bowl. In a separate bowl whisk together the vinaigrette. Dress the green bean salad to your liking with the vinaigrette. I used about 1/4 cup of the vinaigrette.
Meyer Lemon Vinaigrette-
1 Meyer lemon, zested and juiced
1 Shallot, minced (about 1 Tbls)
1/3 cup Olive oil
1/4-1/2 tsp Sea salt
1/4 tsp Black pepper
Whisk above ingredients together until emulsified. This amount of vinaigrette makes enough to dress the salad, with a bit left over to dress future salads. Belly up!!

Monday, March 5, 2012
blizzard pizza
the top three activities that i love to partake in during and after a blizzard are sledding, making homemade pizza, and cross country skiing, in that order. luckily, i have been partaking in those three activities a lot lately! few things compare to the adrenalin rush of barreling down a snow and ice covered incline, at very high speeds, in a cheap and rickety plastic sled! the outcome is always unpredictable. at my daughter's forth birthday party yesterday i watched several young children throw themselves, confidently and not so confidently, down the local sledding hill. it was the most fantastic time ever! no casualties either! this is the top benefit of a blizzard.
making homemade pizza is equally important to the sledding benefits of a blizzard, although this activity happens while the blizzard is in full swing. when the wind is blowing at 30 mph, the snow is blowing sideways in a blinding whirlwind, this is when i start the dough. an unbeatable crust is the utmost important part of the pizza for me. i love crust! i have spent a lot of time fiddling with recipes, to create a crust to my liking. the dough recipe that i have finalized is simple to throw together, and is flavored with fresh herbs and olive oil. you don't have to wait for a blizzard to make pizza. with a little forethought, you can whip this dough up in the morning, and it will be ready and waiting for you after your workday.
Pizza dough:
1/2 cup warm water
2 1/4 tsp yeast
combine the two together and let stand for about 5 minutes
for the rest of the dough, combine in a food processor:
2 cups whole wheat flour
2 cups gluten flour
1 1/2 tsp salt
2 Tbls olive oil
1 tsp fresh chopped rosemary
1 tsp fresh chopped oregano
Add the above ingredients, the water and yeast mixture and 1 cup of room temperature water to the food processor. Process until the mixture forms a ball. Process an additional 30 seconds. Roll the dough out onto a table, and knead by hand a few turns. Place the dough in an olive oil greased bowl. Cover and let double in size.
Once the dough has doubled in size, it's ready to use. You can also cover it and put it in the fridge to use the next day. Because of the gluten flour, this dough is marvelously elastic, and you'll be able to practice your pizza throwing skills right at home. If your not comfortable with airborne dough in your home, roll the dough out on a lightly floured surface. I love a thin and crisp crust, so I go as thin as possible without ripping the dough. You can also go with a thicker crust or something in between. Once the dough is rolled, top with you favorite toppings*, and place in a 450 degree oven until the cheese is melted and the top is starting to brown. I want to emphasize the easiness of this pizza. It has almost become a Friday ritual with my four year old daughter, and when her friends are joining us for dinner, they get in on the experience as well. Hope you enjoy!! Belly up!
* our favorite toppings are very simple. try roasted tomatoes, spinach sauteed with garlic, and feta cheese. another favorite is spicy sausage with roasted mushrooms. we went out on a limb with caramelized onions, mushrooms, chevre, and plenty of fresh herbs- which had great results. addie, my daughter, is a huge fan of multiple cheeses!
Monday, February 20, 2012
Cilantro Pesto
I've been thinking endlessly about a future trip to Florida. Although I dearly love winter, I've been daydreaming about warmer climates. I've been embracing winter traditions and snow sports since I was a child growing up in rural Wisconsin, and for the last part of a decade, here in northern Minnesota. I have been watching my daughter relish her winter expeditions as well. There is something adorably amusing about my daughter as she thinks through strategies during our pond- curling sessions. Winter is embedded in our lives, so deeply, it is hard to envision life without frost. A coworker was telling me about her first jump of the year. She was referring to her first jump into Lake Superior. I asked if I could join her. Then I found out that the first jump will be happening soon! When the air temperatures outside reach 40 degrees! This is what I mean by winter being embedded. We can't help but rationalize these activities as part of our northern climate culture.
I then went back to thinking about Florida. Wonder lost and eager for adventure, I can't help but imagine myself sea kayaking among manatees in warm waters. Paddling from island to island, exploring the shores with nothing more than a swimsuit and a snorkel in my backpack is my new goal. Hopefully Florida memories will be soon to follow! When I talk of memories, I'm talking about memories that include all of the senses.
I like to connect memories with my senses. The smell of pine, dampness, and moss will always remind me of my adventures in the northern Pacific. Tamales, natural hot springs, and my engagement ring will always remind me of New Mexico and the Gila Wilderness. Fresh tulips and pork rinds hot out of the fryer will remind me of the farmer's market in St. Louis. You get the picture. The combinations of sights and smells and sounds all combine to create the best memories that you just can't photograph. I thought I'd whip up a batch of cilantro pesto to inspire and provoke me into future travels. Cilantro is always in abundance. It tastes fresh and earthy, and it's vibrant green color really gets me thinking of the warmer seasons. This recipe is straight forward, and flexible. Play around with it- substitute alternative nuts like pecans or macadamias. Switch up the citrus from lime to yuzu or grapefruit. As always, have fun! Belly up!!
3 cloves garlic
2 cups fresh cilantro
1/4 cup pepitas, toasted
1/4 cup almonds, toasted
2 Tbls fresh lime juice
1 tsp to 1 Tbls chipotle pepper
1/2 tsp salt
1/2 tsp fresh cracked pepper
1/4 cup olive oil
2 Tbls toasted sesame oil
In the bowl of a food processor, add all of the above ingredients except the olive and toasted sesame oils. Blend together, and while the food processor is still blending, slowly drizzle in the oils. Scrape down the sides of the bowl. Give the pesto a taste, and add more salt and/ or more chipotle pepper depending on the level of spice that is preferred. Give the pesto a few more pulses in the food processor. Use immediately. To store the pesto, place in a small bowl, drizzle the top with olive oil, and cover with plastic wrap, pressing the plastic wrap into the surface of the pesto eliminating air pockets. Stores for about a week in the fridge, or about 1 month in the freezer.
Saturday, February 11, 2012
Hot Fudge Sauce
The 'Edible Gifts Class' was great! We made dark chocolate bark with praline almonds and smoked sea salt, brown sugar & rosemary walnuts, espresso shortbread cut-out cookies, a bbq spice rub, and my favorite hot fudge sauce!
I'd like to share the hot fudge sauce with you on this blustery winter morning. The wind outside seems to be buffing the covering of ice we have. It seems almost possible to ice skate along the beach rocks. Even the dog has a look of concern. With a toasty french press full of my favorite coffee, I am already thinking up a few adventures for the day. A snowshoe through the woods? Sledding? A brisk run down the ice covered and hilly road? Oh, let's go back to that hot fudge sauce recipe. Sticky, gooey, intensely flavored hot fudge sauce is my favorite. I like to make an enormous sized batch and give it to folks to perk up their dreary winter days.
Hot Fudge Sauce: recipe derived from, 'The Pie and Pastry Bible'
6 oz bittersweet chocolate
8 Tbl unsweetened cocoa powder
1 1/3 cup water
12 Tbl unsalted butter
1 1/3 cup sugar
8Tbl corn syrup- I substituted maple syrup
pinch of salt
In a heavy bottomed saucepan, melt the chocolate with the cocoa and water, stirring constantly. Add the butter, sugar, corn syrup or maple syrup, and salt. Simmer, stirring until the sugar has completely dissolved. Stop stirring and cook at a moderate boil for about 10 minutes or until the mixture thickens are reduces. Swirl the mixture in the pan occasionally but do not stir. Toward the end of cooking reduce the heat to low to prevent scorching.
Keep warm or reheat in a water bath or microwave, stirring gently.
Stores in the refrigerator for up to 1 month. Belly up!!
Monday, February 6, 2012
Sweets for my sweets
St. Valentine's Day is just around the corner. I usually hang out at home and cook a really nice meal with my family. Then I eat chocolate in abundance. I actually do this most nights of the week, but I try to step it up a notch for holidays. One of my favorite chocolates to settle into is the 'chocolove' brand dark chocolate bar, which is 55% dark chocolate with toasted almonds and sea salt. This bar is easy for me to get my hands on in this small harbor town in which I live. However, when I return to Minneapolis, I get my hands on a 'salty dog' by B.T. McElrath. This chocolate bar is 70% dark chocolate with butter toffee pieces and sea salt. It turns any frown upside down! I do like to make my own chocolates and sweets as well. I am a HUGE fan of edible gifts, hence the 'Edible Gifts Class' at the co-op this week- Thursday @ 7pm. Check out the co-op's home page @ www.cookcounty.coop for more info and registration.
As I was saying- edible gifts. I love giving them. I love receiving them. Homemade jams, hot fudge sauces, flavored sea salts, sugar and spiced nuts, hand-rolled crackers, delicate and delicious cookie varieties are examples of edible gifts I like to tuck into backpacks and mailboxes to surprise folks with a little tasty treat. In loo of the up coming class, I thought I'd share a recipe that I've been eying for quite some time. It's from 101cookbooks, and the recipe is a simple showstopper, and combines a few of my favorite flavors; rosemary, sesame, and brown sugar. You can alter this recipe to fit your tastes. I used smoked sea salt instead of sea salt. I also think that turbinado sugar would do well for the brown sugar, and add a bit of crunch to the mix. The most difficult step in this recipe is not eating these all up while they are still warm!
Brown Sugar Rosemary Walnuts
1 cup brown sugar or natural cane sugar
2 tsp fine grain sea salt or smoked sea salt
1 tsp chopped fresh rosemary leaves
1/4 cup sesame seeds
2 large egg whites
1 lb. about 4 cups shelled walnut halves
1/3 cup chopped dried figs, stems trimmed
Preheat oven to 300 degrees Fahrenheit. Line two baking sheets with parchment paper. In a small bowl, combine the brown sugar, salt, rosemary, and sesame seeds.
In a large bowl whisk the egg whites a bit, just to loosen them up. Add the walnuts and figs to the whites and toss until they are evenly coated- it will take a minute or so. Sprinkle the sugar- spice mixture over the nuts and toss- really well- again.
Split the nut mixture between the two prepared baking sheets in a single layer, separating them the best you can.
Bake for ~25 minutes or until the walnuts are toasted golden and the coating is no longer wet. Cool for a few minutes, then slide the parchment/ nuts off of the hot baking sheets onto a cool surface to cool completely. These will keep for a week or so in an airtight container. Belly up!!
Monday, January 23, 2012
Polenta, Chorizo & Mushroom Lasagne
my daughter's curiosity in the kitchen is growing. she is no longer interested in whisking together ingredients or cracking eggs. she wants to advance to more difficult tasks as cutting vegetables with a knife. after numerous occasions of me saying 'no', i thought i'd give it a go. i took extra precautions, and hovered on the sidelines pacing and trying to hide my anxiety, as she attacked mushrooms with a very dull butter knife. it went well. i talked about finger placement repeatedly. it was difficult for me, but i am learning to trust my daughter in the kitchen. and what did we make with those mushrooms? polenta lasagna with chorizo, spinach and mushrooms!
there was a sledding party saturday morning with a potluck afterwards. i secretly love potlucks. i love the variety of dishes spread out across any given counter top. crock pots full of bubbling chilies. assortments of hot dishes, and let's not forget the bars. it is such a mid western thriller! anyway, we made the lasagna. i have been on a polenta kick lately, and had glanced over a recipe using polenta instead of traditional lasagna noodles, and was inspired. the chorizo paired great with the polenta, and the mushrooms and spinach were great add ins too! i used pre-made polenta which comes packaged in a tube, and you simply slice it to layer in your lasagna. the hard-core traditionalist in me frowned upon this, but the manic, sleep deprived mother who i also am, gladly gave it my approval. here's a recipe/ ingredient list. have fun, and belly up!!
for the sausage/ mushroom/ spinach:
1 pound of chorizo sausage
1 pound mushrooms- i used crimini
4 cloves garlic, minced
half pound of spinach
1 tsp thyme
1/2 tsp oregano
saute about a pound of chorizo in a skillet. once the chorizo is cooked through, remove the pan from the heat, spoon out the sauasage- leaving the pan drippings in the pan. return the pan to the heat. if there's not enough pan drippings to coat the bottom of the pan, add a splash of olive oil. add the mushrooms and saute for a few minutes. add the garlic, spinach, and herbs and saute briefly to wilt the spinach slightly.
for the ricotta mixture:
1 1/2 cups ricotta cheese
1 cup grated parmesan
2 egg yolks
pinch of freshly grated nutmeg
stir the above ingredients in a bowl and set aside.
to assemble:
1 1/2 tubes of polenta, sliced about 1/4 inch thick
1 jar of marinara
1/2 pound mozzarella, grated
1/2 pound parmesan, shredded
grease a 9x13 pan with olive oil. place a layer of marinara in the bottom of the pan. layer as such: polenta sausage-mushroom-spinach mixture ricotta mixture shredded mozzarella and parmesan marinara polenta sausage- mushroom- spinach mixture ricotta mixture shredded mozzarella and parmesan marinara bake uncovered in a 375 degree oven for about 45 minutes or until bubbly around the edges and lightly golden on top.
Tuesday, January 10, 2012
whirlwind
i just got into work this morning. i have done little more than mutter a brief hello to my coworkers. last night we arrived home from a quick trip to st. louis, with a stop on the way to visit friends near chicago. i have menus and new food ideas covering the kitchen table. but this morning, i'll admit, i have very little time to offer up a recipe. instead i thought i'd offer a list of my favorite things for the new year.
i am thankful for my life. my family is amazing! it's all darn great right now! i know that only more great things await, so if it seems like i am moving too fast, it's because i don't want to miss anything. or i'm simply trying to keep up. either way. it's a good way to roll.
i am thankful for the co-op and the lovely workers therein. we're a great team, and they are constantly having to listen to me think out loud about new food ideas, and try experiments and new foods we've whipped up in the deli. i am forever grateful.
i am thankful for my experience and education in food. without it, many things wouldn't be. my pantry would suffer too. things that are in my pantry and fridge that make we smile:
toasted sesame oil. it's toasted sesame flavor marries well with venison and wild rice- my two favorite local eats.
caramelized onion cheddar. it's sweet, salty, tangy, creaminess always make me so incredibly happy.
cilantro. it's so fresh. it's so alive. it makes a great pesto when paired with chilies and toasted pine nuts. i'll talk more about that later.
whole wheat pastry flour. it gives pastries such a delicate crumb. it being a whole wheat flour, one might expect a dense and hearty end product, but this flour is so light and it just rocks with pastries.
thanks to everyone who reads this blog!i promise more recipes, more pictures, and more food chit chat to come!! belly up!!
Monday, January 2, 2012
Champagne Cupcakes with Grapefruit Curd
okay. it's the new year. i bypassed the typical resolution list, and went right for a dollop of leftover champagne frosting to nosh on with my morning coffee. one breathe at a time is an except able plan. i must elaborate on the champagne cupcakes with grapefruit curd and the previously mentioned champagne frosting. i woke up new year's morning and did my usual morning routine. i tickled my daughter, i fed and loved up the dog, coffee, early morning jumping competition on the bed while my fiance is desperately holding onto his last few moments of sleep, more tickling, and then i opened a bottle of prosecco that my fantastic coworker donated to the cause. the cause being the cupcakes. i read about the cupcakes on this website: www.the-baker-chic.com. i was baffled. what a great idea! the recipe went together very easily, and the end results were amazing! i regret that i didn't share this sooner, so that everyone could partake in a new year's eve devouring of cupcakes, but these cupcakes are so special! i can think of at least a dozen occasions for which to make these. wedding celebration. valentine's day. birthday party. easter? baby shower. fridays. mondays. fourth of july. you just received a raise party. graduations. housewarming. the first snow....there. that's 12. whew! i whipped up a batch and shared them with my coworkers, and i feel that all of our moods were uplifted. belly up!!
Champagne Cupcakes with Grapefruit Curd
The Cake:
1/2 cup butter, softened
1 cup granulated sugar
2 eggs
1 tsp vanilla
1 3/4 cup flour
1/2 tsp baking soda
1/4 tsp baking powder
1/4 tsp salt
1/2 cup sour cream
1/2 cup champagne, prosecco, or your choice of sparkling wine
Preheat oven to 350 degrees. In the bowl of a standing mixer fitted with the paddle attachment, cream together the butter and sugar until light and fluffy. Add eggs one at a time beating well after each addition. Add vanilla and mix. Whisk together the flour, baking soda, baking powder, and salt and set aside. In another bowl, whisk together 1/2 cup champagne and 1/2 cup sour cream. Add the four mixture alternately with the champagne mixture until all ingredients are well incorporated. Batter will be thick. Fill cupcake papers with 1/4 cup level measures of batter. Bake for 15-20 minutes. Set aside.
Grapefruit Curd: refer to my previous post on grapefruit curd. a half batch should be enough for filling the cupcakes.
Champagne Frosting:
1 cup plus 1 tbls champagne or prosecco
2 sticks of butter, softened
2 1/2 cups confectioner's sugar
Place 1 cup of champagne in a small saucepan. Simmer over medium-high heat until reduced to 2 tablespoons. Transfer to a small bowl and allow to cool. In the bowl of a standing mixer fitted with the whisk attachment, cream softened butter and powdered sugar together. Once the frosting is thick and fluffy, pout in the reduced 2 tbls of champagne plus the 1 tbls champagne from the bottle and mix well. Note- I did a batch and a half of frosting, which made enough to pipe a fairly large dollop atop each cupcake. Fill and frost the cupcakes and enjoy!!
Subscribe to:
Posts (Atom)