At the food co-operative where I work, we have an abundance of stone fruit right now. It is so ripe and ready, that you can't pass them up for another day! It happens sometimes though, that folks decide to buy peaches later in the week, and those peaches that are ready, just don't wait. So when my co-worker handed me a half of a case of bruised but perfectly ripe white peaches, I couldn't say no. It wasn't possible. The peaches wouldn't allow it. Besides, I had been thinking about peach jam. Opportunity just presented itself.
White peaches are similar in flavor to your everyday yellow peach, but with a bit of a mild honey, floral, and melon flavor. When eaten in their perfect ripeness the juice flows down to your elbow, and the flavor is exceptional! Since I was going to be working with white peaches, a touch more unusual than yellow peaches, I wanted a jam recipe that was a touch unusual as well. Peach jam is wonderful, but I wanted to add some other flavors that would highlight the white peaches. Brown sugar, ginger, and dark rum came to mind. With those flavors I kept thinking about the tropics and the spice trade, and so cardamon, cinnamon, and allspice made there way in as well. It all worked together very well, and I was happy with the end result!
Spiced White Peach Jam
4 cups white peaches, peeled, and chopped
6 1/2 cups granulated sugar
1 cup brown sugar
1 lemon, zested and juiced
1/2 tsp cardamon
1/2 tsp cinnamon
1/2 tsp allspice
1-1 inch chunk of fresh ginger, peeled and grated
1/4 cup dark spiced rum
1 Tbls butter (optional. it helps remove the foam)
1 package of liquid pectin
Prepare the fruit. In a large stock pot combine all of the above ingredients except the liquid pectin. Bring those ingredients to a rolling boil (a boil that keeps on boiling while you are stirring it). Add the liquid pectin, and continue to stir at a rolling boil for 1 minute. After 1 minute turn off the heat and ladle jam into prepared jars. Process in a water bath for 10 minutes. Remove from the water bath, and allow to cool to room temperature. Share a jar with your neighbors and friends. Trade a jar for some freshly baked bread, and slather away! Belly up!!
Tuesday, July 17, 2012

Monday, July 9, 2012
Grilled Turmeric & Lemongrass Chicken

This week I thought I'd try a recipe I came across in my newest Bon Appetit magazine. There I found inspiration with an article on Malaysian cooking. The author had learned while in Malaysia, he could transform a marinade into a basting liquid, then reduce it and serve it as a dipping sauce. This method not only utilizes all of the marinade through the different stages of cooking, but it also ensures a depth of flavor with all of the layering going on. The marinade goes together easily in the blender, the chicken marinates overnight, and the next day there is minimal cooking required. The recipe calls for chicken wings, but I substituted chicken thighs. I'm thinking that this might be a great way to go about turkey legs in the future. Or pork. Or fish. Or tofu.
Grilled Turmeric and Lemongrass Chicken:
1 cup canned unsweetened coconut milk
3 shallots, chopped
3 garlic cloves
2 lemongrass stalks, (bottom third only, tough outer layers removed), finely chopped
2 jalapenios
1 1" piece of ginger, peeled and chopped
2 Tbsp fresh lime juice
2 Tbsp tamarind juice concentrate (not paste or pulp) or 1 Tbsp fresh lime juice
1 Tbsp fish sauce
2 tsp kosher salt
1 tsp tumeric
Combine all of the above ingredients in a blender with 1 cup of water, and puree until a smooth marinade forms.
Place 3lbs chicken wings or thighs in a large baking dish. Pour marinade over; turn chicken to coat evenly. Cover chicken and chill overnight.
Remove chicken from marinade, shaking any excess marinade back into the dish. Transfer chicken to a large platter. Let stand at room temperature for 15 minutes.
Transfer marinade to a large saucepan and bring to a boil over medium heat. Reduce heat to medium-low and simmer, stirring occasionally, until marinade thickens, 10-15 minutes. Pour half of marinade into a small bowl; set aside for basting chicken while it grills. Keep remaining marinade in saucepan, cover and keep warm until ready to serve the chicken.
Build a medium fire in a charcoal grill, or heat a gas grill to medium- high heat. Oil grill grates to prevent sticking. Grill chicken, turning every 5 minutes or so and basting occasionally with marinade in samll bowl, until fat is rendered and skin is nicely charred in spots, 30-35 minutes. (The key here is to turn the chicken often so the skin doesn't burn.)
Continue cooking chicken without basting (so it will get crsip) until chicken is cooked through, about 10 minutes longer.
Transfer chicken to a large platter and let it rest for 5 minutes. Squeeze lime wedges over wings. Transfer marinade to a small bowl. Serve warm marinade alongside chicken as a dipping sauce.
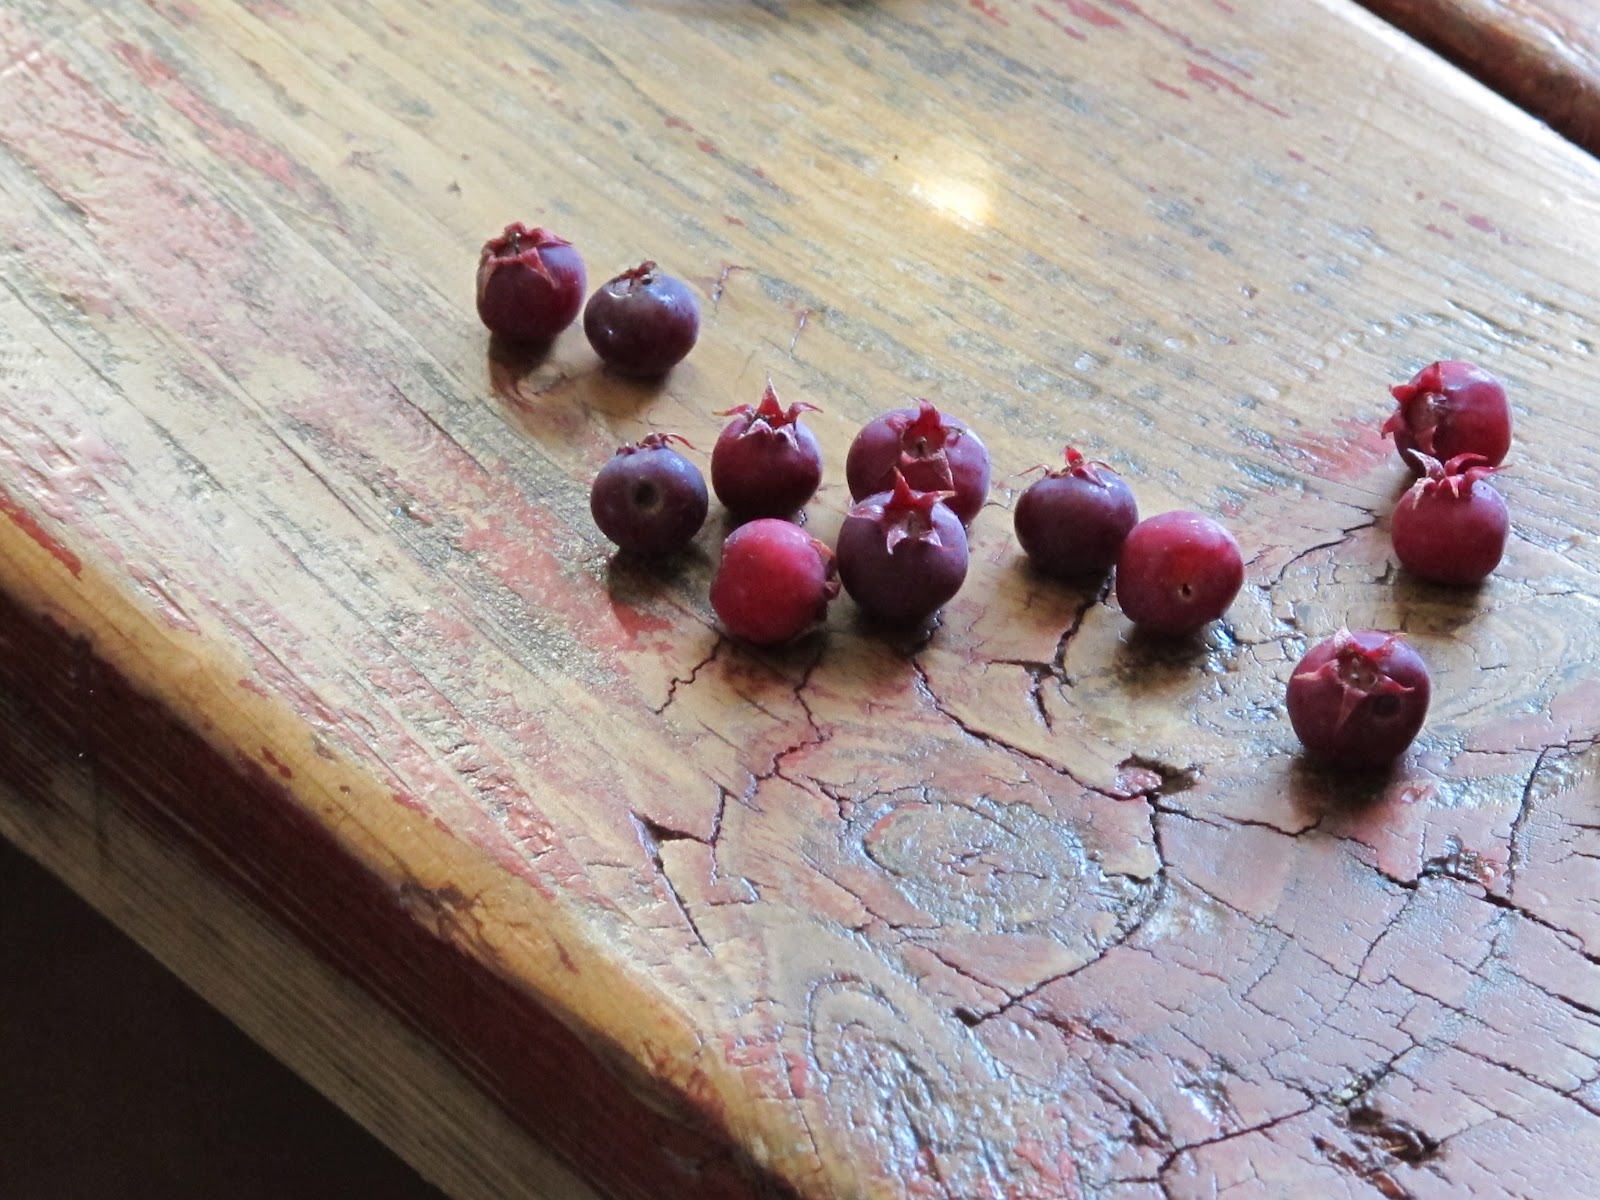
P.S. I thought I'd share a pic of our dessert that followed. A handful of Saskatoon berries picked from the back yard, er, forest. Also called June berry, Pigeon berry, or Service berry, these berries are native in North America from Alaska across much of Western Canada. With a sweet nutty flavor the fruits have long been eaten by Canada's aboriginal people, and is a well known ingredient in pemmican. Saskatoon berries are becoming more known as a super fruit for its nutritional value and health benefits. I think they go well with dry bubbly wine! Belly up!!
Tuesday, June 12, 2012
Addie's Buckwheat Buttermilk Flapjacks

Addie's Buckwheat Buttermilk Flapjacks:
1 cup buckwheat flour
1 cup whole wheat pastry flour
1 tsp baking soda
1 tsp salt
Whisk together all of the above ingredients in a medium sized batter bowl. In a separate bowl mix together:
2 cups buttermilk
1/4 cup butter, melted
2 eggs
3 Tbl maple syrup or honey
Combine the wet and dry ingredients until just combined. Fold any additional fruit as well, about 1 cup worth. A great cast iron skillet works great for cooking a few pancakes at a time. You want to cook the cakes over an even and consistent heat source. Make sure the pan is pre-heated correctly, or you'll end up with pancakes that spread too much and not rise well.

I am really interested in the variety of flours that are now available. Switching up the flours in your recipes can add wonderful flavors. It can be as simple as swapping half of the all-purpose flour in your chocolate chip cookie recipes, with whole wheat pastry flour. It adds a slightly nutty flavor with a honey-sweetness undertone. I bought a cookbook called, "Good to the Grain", written by Kim Boyce. Each chapter features a variety of flour. From Amaranth flour to Buckwheat flour to Spelt flour, this book includes many great recipes. I enjoy this book the most because it seems built on the fundamentals of utilizing these great grains for their unique flavors, and the end results are tasty! Typically when I see multigrained recipes those grains are used as substitutes to make baked goods either healthier or gluten- free, which isn't always a tasty end product. There is a forward written by Nancy Silverton in the beginning of the book, and she sums it up perfectly by writing the following: "My priority as both a baker and an eater is not health but flavor. What makes the recipes in this book so special is that- weather you care about whole grains or not- they are truly delicious." That makes me smile.
Here is an easy mulitgrain flour blend recipe that is included in 'Good to the Grain':
1 cup whole wheat flour
1 cup oat flour
1 cup barley flour
1/2 cup millet flour
1/2 cup rye flour
This recipe was designed to be versatile. You can also experiment with blends of your own. Kim says to keep in mind that every flour is different and has different qualities, so your goal is to create the right balance of flavor and structure. This blend would make wonderful pancakes! Belly Up!!
Monday, May 28, 2012
Northern Pike Tacos

The flesh of the Pike is white and mild tasting, and over the years the previously mentioned college pals have learned how to fillet the fish around the "Y" bones, leaving an almost boneless fillet to work with. And with a little research, I learned that Pike has quite a history in cuisine. I vaguely remember a puree of northern pike which we created in culinary school. We added cream, herbs, and spices, formed the mixture into quenelles, and lightly poached them in flavorful fish stock we had made from the fish carcasses. Yeah, I certainly wasn't going to attempt that project on a weeknight, after working all day, with a young child and a Labrador retriever to wrangle. When was the last time I shaped anything into a quenelle anyway? My days as a Chef seem so long ago.....so, I decided on Northern Pike tacos. I marinated the flesh in lots of cumin, garlic, and lime. I used the zest and juice of the limes which gave the fish an almost ceviche quality. What I mean by ceviche, is that the acidity of the lime juice started 'cooking', or breaking down the fresh Pike meat. It really infused the flavors into the meat, which made for tasty fish with minimal effort. I then fired up the grill and grilled corn tortillas alongside the marinated fish. I assembled each taco with a slather of fresh made guacamole and fresh cilantro. It was fabulous. No children or dogs were injured in the pre-dinner wrangling, and all bellies were full. The end. Belly up!!
Marinade for fish:
3 cloves garlic
2 limes, zested and juiced
2 tsp ground cumin
1 1/2 tsp kosher salt
1 tsp fresh cracked pepper
1/4 cup tequila
1 lb. fresh fish
Place all of the above ingredients, except fish, in a food processor and process for about 45 seconds. Place the fish and the marinade in a 1 gallon sized zip-lock plastic bag. Gently squeeze the bag to remove any excess air before sealing the bag closed. Place the bag of marinating fish in the fridge for about an hour. Remove from fridge, place on pre-heated grill, and grill for about 2-5 minutes on each side (depending on fillet size), making sure not to over-cook the fish.
Pair fish with grilled corn tortillas, fresh guacamole, fresh cilantro, and any other fix'ns you desire: thinly sliced cabbage, radishes, and/ or onions would be nice. Grilled peppers and goat cheese would work too!!

Monday, May 14, 2012
Mama's ribs
Happy Mother's Day Mom! Happy Mother's Day to all the Moms out there. I was going to cook something dainty and sweet this weekend for Mother's Day. Then I realized that women dig foods that are hearty and robust just as much as any guy I know. Plus, I am madly in love with a carnivore addict, and he brings out the 'pit- master' side of me. I settled on ribs. I bought a full rack of pork ribs, rubbed them down with a very simple rub, seared them on the grill, allowed them to slowly roast in the oven with beer, and then finished them on the grill slathered with sauce! Sounds a little putsy? Well, maybe, but that's kinda what I have grown to love about BBQ.
First the rub. The rack I had bought was a bit too big to fit on our grill, so I started by halving the rack. Then I sprinkled each side with sea salt, lots of fresh cracked pepper, brown sugar, and chili flakes. I wanted a touch of sweetness and lots of kick, hence the hefty sprinkling of fresh cracked pepper. The chili flakes add additional spice, different from that of the black pepper, and could be omitted depending on your personal taste. Normally I go a little nuts coming up with spice blends, but I kept it simple this time. Cumin, smoked paprika, allspice, cocoa powder, and ginger would be great additions. Play around with it. You'll probably come up with something really interesting. I allowed the ribs to hang out, all rubbed in spices, while my fella and I went for a 6 mile hike around the Devil Track River.
The searing. When I cook ribs, I go to the braising method. Braising is a combination cooking method using both moist and dry heat. Typically the food is seared over high heat and then finished in a covered pot with liquids. Pot roast would be an example. So, I seared the ribs on the grill so they would have the smokiness and a bit of the charred edges, which I am fond of. Just before I removed the ribs, I brushed them up with apple cider vinegar. Then I removed the ribs from the grill, placed them in a roasting pan with 2 cups of chicken stock, and 1 Sam Adams Cherry Wheat beer. This particular beer was left behind from a seasonal sample pack of beers. While it may not be my favorite drinking beer, it's cherry notes worked perfectly with the pork. Hard cider would be a good choice too. I let them roast for about 1 1/2 hours.
The finish. Remove the ribs from the roasting pan, and place them on a preheated grill. I like to add more smoky depth and crisp up the exterior a bit at this point. Now is a good time to slather on BBQ sauce if you like, and allow it to grill into the meat. Below is a run down of the BBQ sauce I came up with.
Remove the ribs from the roasting pan, and you are left with about a half of a cup of reduced liquids. This stuff is gold. Place the roasting pan on the burners of your stove top. De glaze the pan with a splash of red wine or beer, whatever you happen to be drinking. Scrape up all the bits and juices. To this pan add:
2 Tbl apple cider vinegar
2 Tbl agave (honey or maple syrup would do wonderfully)
1 Tbl stone ground mustard
1 Tbl chili powder
1 tsp chili sauce ( I used Sriracha)
1/2 cup ketchup
fresh cracked black pepper, to taste
smoked sea salt, to taste
Whisk all of the above ingredients together with the pan juices. If it seems too thick, add more liquids to thin it out. Here again, I encourage you to create this to your own tastes. Everyone's palette is different. Maybe some of you like more tang. Up the vinegar.You've got a sweet tooth, up the sweetener. I kept it simple again, and kept with the black pepper and chili spices. I try to balance the sweet, smoky, tang, and spice. Hope you enjoy! Belly up!!
First the rub. The rack I had bought was a bit too big to fit on our grill, so I started by halving the rack. Then I sprinkled each side with sea salt, lots of fresh cracked pepper, brown sugar, and chili flakes. I wanted a touch of sweetness and lots of kick, hence the hefty sprinkling of fresh cracked pepper. The chili flakes add additional spice, different from that of the black pepper, and could be omitted depending on your personal taste. Normally I go a little nuts coming up with spice blends, but I kept it simple this time. Cumin, smoked paprika, allspice, cocoa powder, and ginger would be great additions. Play around with it. You'll probably come up with something really interesting. I allowed the ribs to hang out, all rubbed in spices, while my fella and I went for a 6 mile hike around the Devil Track River.
The searing. When I cook ribs, I go to the braising method. Braising is a combination cooking method using both moist and dry heat. Typically the food is seared over high heat and then finished in a covered pot with liquids. Pot roast would be an example. So, I seared the ribs on the grill so they would have the smokiness and a bit of the charred edges, which I am fond of. Just before I removed the ribs, I brushed them up with apple cider vinegar. Then I removed the ribs from the grill, placed them in a roasting pan with 2 cups of chicken stock, and 1 Sam Adams Cherry Wheat beer. This particular beer was left behind from a seasonal sample pack of beers. While it may not be my favorite drinking beer, it's cherry notes worked perfectly with the pork. Hard cider would be a good choice too. I let them roast for about 1 1/2 hours.
The finish. Remove the ribs from the roasting pan, and place them on a preheated grill. I like to add more smoky depth and crisp up the exterior a bit at this point. Now is a good time to slather on BBQ sauce if you like, and allow it to grill into the meat. Below is a run down of the BBQ sauce I came up with.
Remove the ribs from the roasting pan, and you are left with about a half of a cup of reduced liquids. This stuff is gold. Place the roasting pan on the burners of your stove top. De glaze the pan with a splash of red wine or beer, whatever you happen to be drinking. Scrape up all the bits and juices. To this pan add:
2 Tbl apple cider vinegar
2 Tbl agave (honey or maple syrup would do wonderfully)
1 Tbl stone ground mustard
1 Tbl chili powder
1 tsp chili sauce ( I used Sriracha)
1/2 cup ketchup
fresh cracked black pepper, to taste
smoked sea salt, to taste
Whisk all of the above ingredients together with the pan juices. If it seems too thick, add more liquids to thin it out. Here again, I encourage you to create this to your own tastes. Everyone's palette is different. Maybe some of you like more tang. Up the vinegar.You've got a sweet tooth, up the sweetener. I kept it simple again, and kept with the black pepper and chili spices. I try to balance the sweet, smoky, tang, and spice. Hope you enjoy! Belly up!!
Monday, April 30, 2012
Ocean Harvest
When returning home from an adventure, I usually take my time in reminiscing. Thinking over the smallest but usually most wonderful details. I was thinking about my most recent visit to the warm and wonderful, Florida. I was in or on the water everyday, the water being the Atlantic Coast and the Gulf Coast. I paddled kayaks and paddle boards. Enjoyed the quiet sail aboard a catamaran, and perused the coast in a fishing boat. I ate epic portions of seafood, all of which was caught fresh right under our noses. We ate grilled gulf shrimp, Jamaican jerk hog fish, conch ceviche, conch fritters, fresh tuna salad, stone crab claws, blue crab cakes, amazing lobster bisque, and the best smoked fish dip I have ever tasted. This smoked fish dip was made by a very magnificent woman named Theresa. She has Minnesota roots, but has been in Key West for years now. We stayed with Theresa and her husband Mitch, a fishing guide. Mitch took us fishing out on his boat one day, and it will be tough to beat that fishing trip. I never landed the monstrous Tarpon that I was fishing that day, but I had one on my line long enough to realize that the strength and endurance in the genetics of this fish might just outweigh my own. I was lucky to have had this experience, and even more lucky to have watched as hundreds of Tarpon rolled past our boat as they migrated into the keys. I have never seen such large schools of fish! Unfortunately their appetite dwindles after their long migration, and they spend most of their time filling their air bladders full of oxygen, which is how they breathe. If they aren't allowed to access to the surface, they will die as they are air breathers. I sat in that boat with my wind tasseled hair and sun-kissed skin, reflecting on my journey. How vast and wild the ocean can be reminds me of the great Lake Superior. The specimens lingering below the surface, the waves keeping me in suspense, and the joy of being on the water is still an unbeatable joy I cherish.
Smoked fish is a staple here in Grand Marais. Smoked by local fisherman, with their fresh catch of the day, it is impossible to beat. I was just in the local fish market where they had fresh smoked salmon, whitefish, and cisco. We are often given smoked fish from our neighbor, right out of the smoker, lightly glazed with maple syrup they've made themselves as well. It's the most incredible treat. We usually eat it straight up, but if there are leftovers, we made smoked fish dip. You can slather this dip on crackers, bagels or toasted baguette slices. It is also great dolloped in scrambled eggs or avocados. There are a slew of ways to alter the recipe, but here's how we do it:
1 pound smoked fish, cleaned (skin removed, de-boned, and flaked)
2 Tbl fresh chopped chives or scallions
1/4 cup greek yogurt- the unsweetened variety
1/4 cup mayo
generous pinch of cracked black pepper
Mix above ingredients together. If the mixture seems dry, add a bit more mayo. It's all about personal taste like I mentioned before. If you had some garlic scapes, they would make a great substitution for the chives. Some folks really like fresh dill and/ or fresh tarragon in the mix as well. Those would make great additions! I've just been keeping the recipe very simple since the ingredients are superb. Belly up!!
Smoked fish is a staple here in Grand Marais. Smoked by local fisherman, with their fresh catch of the day, it is impossible to beat. I was just in the local fish market where they had fresh smoked salmon, whitefish, and cisco. We are often given smoked fish from our neighbor, right out of the smoker, lightly glazed with maple syrup they've made themselves as well. It's the most incredible treat. We usually eat it straight up, but if there are leftovers, we made smoked fish dip. You can slather this dip on crackers, bagels or toasted baguette slices. It is also great dolloped in scrambled eggs or avocados. There are a slew of ways to alter the recipe, but here's how we do it:
1 pound smoked fish, cleaned (skin removed, de-boned, and flaked)
2 Tbl fresh chopped chives or scallions
1/4 cup greek yogurt- the unsweetened variety
1/4 cup mayo
generous pinch of cracked black pepper
Mix above ingredients together. If the mixture seems dry, add a bit more mayo. It's all about personal taste like I mentioned before. If you had some garlic scapes, they would make a great substitution for the chives. Some folks really like fresh dill and/ or fresh tarragon in the mix as well. Those would make great additions! I've just been keeping the recipe very simple since the ingredients are superb. Belly up!!
Monday, April 2, 2012
Chocolate Bundt Cake
I came across a chocolate bundt cake recipe from 101cookbooks.com. The author talked about how well the cake seemed to hold up during some traveling, a feature that I love to discover about foods. If it travels well, then the chances of me tucking into my backpack and going for a stroll are very good. I love having homemade treats to share with a friend as we sit on a park bench and watch the seagulls.Or as we sit atop a boulder, legs dangling below, and enjoy a sunset. This cake, once completely cooled, frosting set, and cut into thick wedges does travel pretty well. It certainly wouldn't withstand a rigorous back country backpacking trip, but a day hike or a road trip would welcome this cake!
I had a thick, chocolatey, spiced stout in my fridge which aided in my a hankering for this chocolate cake.
The cake calls for simmering stout or porter into a slightly thicker and reduced syrup. You then blend the stout with a hefty amount of cocoa and a not so hefty amount of butter which creates a fantastic, chocolatey cream to fold into the cake batter. The cake is sweetened with a dark brown sugar, which yields the highest percent of molasses, and honey and/or maple syrup. You could skip the brown sugar and increase the honey or maple syrup if you'd prefer. The cake also uses a blend of whole wheat and all- purpose flour, which I really like. You could use one or the other flours in full quantity as well.
Chocolate Bundt Cake:
2 cups porter or stout
8 Tbl butter, plus more for the pan
3/4 cup natural cocoa powder
1 cup whole wheat flour
1 cup all-purpose flour
1 cup dark brown sugar
1 1/2 tsp baking soda
3/4 tsp sea salt
3 eggs
1 1/2 cups plain whole yogurt
3/4 cup maple syrup or honey
Chocolate Buttermilk Icing:
3/4 cup powdered sugar
1/4 cup natural cocoa powder
2 Tbl buttermilk
Preheat oven to 350F/ 180C, with a rack in the center of the oven.
Butter and flour (generously) an 11 or 12 cup capacity bundt pan (or equivalent). You can bake this in other cake pans, just be mindful to avoid filling the pan(s) more than 2/3- 3/4 full. Adjust the baking times as well- baking until the cake begins to pull away from the sides of the pan, and the center tests clean when you insert a knife.
In a saucepan simmer the beer down to 1 cup. Remove from heat, add the butter and stir until melted. Stir in the cocoa powder, mixing until smooth, then set aside to cool, stirring occasionally to let off heat.
In a medium bowl, whisk together the flours, sugars, baking soda, and salt. Set aside.
In a large mixing bowl, combine the eggs, yogurt, and maple syrup or honey. Whisk well, until nicely blended and uniform in appearance. Gradually add the (cooled) stout mixture, stirring all the while. Stir until well blended. Add the flour mixture, folding until just blended, using as few strokes as possible.
Transfer the batter to the prepared pan and bake for 35-45 minutes if using the bundt pan, or until a knife inserted in the center comes out clean. You really don't want to over bake this cake- err on the slightly moist side if anything. Remove from the oven, and turn out onto a cooling rack after several minutes.
In the meantime, make the icing by whisking together the powdered sugar, cocoa, and buttermilk. Really go at it for at least a minute. The icing should end up smooth and creamy looking, adjust with a touch of powdered sugar or a few drops of buttermilk if you want to tweak the consistency at all. When the cake is completely cool, run the icing around the top with an offset spatula and let set. I actually frosted when the cake was still warm, so the icing oozed down the sides of the cake a bit. I preferred this over just a layer of frosting over the top, but either way is great!
Serve sprinkled with a bit of flaky sea salt. Belly up!!
I had a thick, chocolatey, spiced stout in my fridge which aided in my a hankering for this chocolate cake.
The cake calls for simmering stout or porter into a slightly thicker and reduced syrup. You then blend the stout with a hefty amount of cocoa and a not so hefty amount of butter which creates a fantastic, chocolatey cream to fold into the cake batter. The cake is sweetened with a dark brown sugar, which yields the highest percent of molasses, and honey and/or maple syrup. You could skip the brown sugar and increase the honey or maple syrup if you'd prefer. The cake also uses a blend of whole wheat and all- purpose flour, which I really like. You could use one or the other flours in full quantity as well.
Chocolate Bundt Cake:
2 cups porter or stout
8 Tbl butter, plus more for the pan
3/4 cup natural cocoa powder
1 cup whole wheat flour
1 cup all-purpose flour
1 cup dark brown sugar
1 1/2 tsp baking soda
3/4 tsp sea salt
3 eggs
1 1/2 cups plain whole yogurt
3/4 cup maple syrup or honey
Chocolate Buttermilk Icing:
3/4 cup powdered sugar
1/4 cup natural cocoa powder
2 Tbl buttermilk
Preheat oven to 350F/ 180C, with a rack in the center of the oven.
Butter and flour (generously) an 11 or 12 cup capacity bundt pan (or equivalent). You can bake this in other cake pans, just be mindful to avoid filling the pan(s) more than 2/3- 3/4 full. Adjust the baking times as well- baking until the cake begins to pull away from the sides of the pan, and the center tests clean when you insert a knife.
In a saucepan simmer the beer down to 1 cup. Remove from heat, add the butter and stir until melted. Stir in the cocoa powder, mixing until smooth, then set aside to cool, stirring occasionally to let off heat.
In a medium bowl, whisk together the flours, sugars, baking soda, and salt. Set aside.
In a large mixing bowl, combine the eggs, yogurt, and maple syrup or honey. Whisk well, until nicely blended and uniform in appearance. Gradually add the (cooled) stout mixture, stirring all the while. Stir until well blended. Add the flour mixture, folding until just blended, using as few strokes as possible.
Transfer the batter to the prepared pan and bake for 35-45 minutes if using the bundt pan, or until a knife inserted in the center comes out clean. You really don't want to over bake this cake- err on the slightly moist side if anything. Remove from the oven, and turn out onto a cooling rack after several minutes.
In the meantime, make the icing by whisking together the powdered sugar, cocoa, and buttermilk. Really go at it for at least a minute. The icing should end up smooth and creamy looking, adjust with a touch of powdered sugar or a few drops of buttermilk if you want to tweak the consistency at all. When the cake is completely cool, run the icing around the top with an offset spatula and let set. I actually frosted when the cake was still warm, so the icing oozed down the sides of the cake a bit. I preferred this over just a layer of frosting over the top, but either way is great!
Serve sprinkled with a bit of flaky sea salt. Belly up!!
Subscribe to:
Posts (Atom)